Melissa's Cuisine: May 2013

Friday, May 31, 2013

Strawberry Banana Smoothie {In A Bag}

Melissa's Cuisine: Strawberry Banana Smoothie {In A Bag}
Do you ever wish you had more hours in your day?  Believe me, I sure do!  It seems life keeps going faster and faster, with no intentions of slowing down.  Oh, what I would give for just two more hours in my day!
Melissa's Cuisine: Smoothie Week


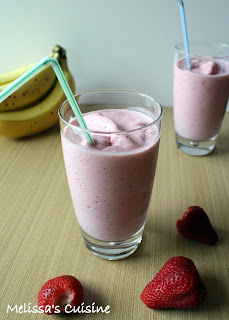
But, since that doesn't seem to be a reality, I have learned to find things to simplify my life.  This week I've been sharing smoothie recipes with you, and today's recipe can be made two ways.  I'm sure you've seen the bags of smoothie ingredients in the freezer section at the grocery store.  This is my homemade version of those.
Melissa's Cuisine: Strawberry Banana Smoothie {In A Bag}


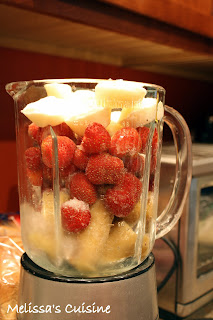
I bought a container of yogurt and filled mini muffin tins with a Tablespoon of the yogurt.  Then, I froze it to make little yogurt cubes.  I added those cubes to Ziploc bags along with strawberries and banana pieces.  Now, my freezer is stocked with smoothie bags and when I want a smoothie, I just need to put the contents of the bag and some milk in my blender and viola!  It's smoothie time!
Melissa's Cuisine: Strawberry Banana Smoothie {In A Bag}

Strawberry Banana Smoothie {In A Bag}

Makes 8 smoothie bags (8 smoothies)

Ingredients:
1 32 ounce container vanilla yogurt
8 cups strawberries
8 bananas, sliced
8 sandwich size ziploc bags
4 cups milk

1.  Scoop yogurt into the openings of a mini muffin tin, 1 Tablespoon of yogurt per opening.

2.  Freeze yogurt until solid, about 3 hours.

3.   Allow the yogurt bites to thaw at room temperature for about 10 minutes, until they can easily be removed from the tin.  (I flipped my tin upside down on the counter and then hit the bottom with my palm until the yogurt bites fell out.  It worked well for me!)

4.  Place 4 yogurt bites, 1 cup of strawberries, and 1 sliced banana in each ziploc bag and seal.

5.  Store the smoothie bags in the freezer until you're ready to use them.

6.  To make your smoothie, place the smoothie bag ingredients along with 1/2 cup milk in a blender.  Blend until smooth.

If you just want to make a strawberry banana smoothie, not the smoothie bags, here's the recipe:

Strawberry Banana Smoothie

Serves 1

Ingredients:

1/4 cup vanilla yogurt
1 cup strawberries (fresh or frozen)
1 banana (fresh or frozen), sliced
1/4 cup milk
4 ice cubes, optional (use only if you're using fresh fruit)

Blend ingredients in a blender until smooth.

Wednesday, May 29, 2013

Power Smoothie

Melissa's Cuisine: Smoothie Week
I don't talk about it a lot here, but one of my greatest passions is exercise and fitness.  It seems a little contradictory--a food blogger (and not a healthy one) who loves to run and work out!  But, it's the truth.

I didn't always love working out.  After Mike and I got engaged, I started working out every day to get in shape for our wedding.  I ate well and felt great.  When we got married, I was at what I believe to be my lowest weight as an adult.  Then we got married, and I started eating as much as Mike, and the pounds started packing on.  I wasn't exercising as much because I didn't have the motivation of my wedding!

Melissa's Cuisine: Power Smoothie
A few months after we got married, I found some motivation and started the couch to 5k program.  I realized how much I still enjoyed working out, and discovered a new love--running. The summer after we got married, I purchased a trial gym membership for each of us.  I would get up in the mornings with Mike and when he would head to work, I would go to the gym.   After our trial membership ended, we purchased a "real" gym membership at another gym.  I loved going every morning and getting a good workout in before work.  I also fell in love with spinning and weight lifting.

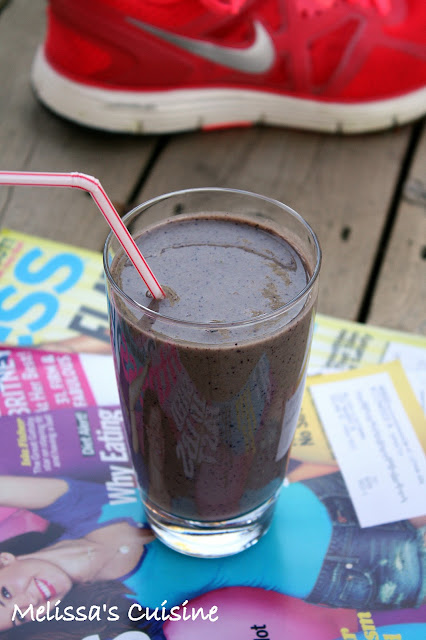
After a hard workout, I'd often come home and make what I call a power smoothie.  It's called power because it has blueberries (high in antioxidants), kale (a superfood), and flax seed (a wonder food) in it.  It tastes great, and I found it to be a great recovery drink after a workout.  Sometimes I'd even add a scoop of protein powder to the mix for more staying power.

I made one of these for Mike after we worked out together.  I didn't tell him that it had kale in it until after he finished drinking (and enjoying) the smoothie.  Then I told him it was really a green smoothie and he wasn't too impressed!  He told me to never hide healthy stuff in his food again.  Ha!  That's one request I don't think I'll be following ;)
Melissa's Cuisine: Power Smoothie

Power Smoothie

Serves 1

Ingredients:
1 cup frozen blueberries
1 small handful spinach or kale
1 frozen banana
1 Tablespoon ground flax seed
1/2 cup yogurt

Blend ingredients together in your blender until smooth.  Serve immediately.

Monday, May 27, 2013

Tropical Smoothie

Melissa's Cuisine: Tropical Smoothie

Happy Memorial Day!  I hope that you are having a relaxing day and enjoying time with your family and friends.  Be sure to take some time today to think of the men and women who are serving our country--those who have lost their lives, our veterans, and those who are currently serving.  Thank you!

For many people, today marks the official beginning of summer.  The weather is warmer, the days are longer, and the food is better!  Summer food is my favorite--grilled meals, fresh fruits, frozen desserts, ice-cold drinks...

Melissa's Cuisine: Smoothie Week
So, today I am kicking off "Smoothie Week".  Though I often make smoothies year-round, I find I make them more frequently in the summer.  They make their appearance for breakfasts, lunches, dinners, and snacks.  The majority of the time, I don't follow a recipe for smoothies.  I usually just mix together whatever blend of fruits I find in the freezer and call it good.

Sometimes though, I do follow a recipe, like this one for a Strawberry Cheesecake Smoothie.  This week, I'll share a few of the smoothies I make the most frequently.  Don't worry, I made sure to measure out the ingredients so I promise they'll taste great!
Melissa's Cuisine: Tropical Smoothie
This smoothie is one of my favorites.  I absolutely love mangoes and the combination of mango and pineapple gives a great tropical taste. It makes me feel like I'm in the Caribbean or Hawaii, and there's nothing wrong with that!

I made this smoothie with fresh cut fruit.  However, this would work just as well with frozen fruit if that's what you have on hand.  You could also plan ahead and dice up the fruit and then freeze it for the smoothies.  If you use frozen fruit, you may not need as much ice.  I like my smoothies to be ice cold, so I always add a few ice cubes. 
Melissa's Cuisine: Tropical Smoothie

Tropical Smoothie

Serves 1

Ingredients:
1 mango, peeled and diced (approximately 3/4 cup if frozen)
1/4 cup pineapple chunks
1/2 cup plain yogurt
1 teaspoon agave nectar (optional)
4 ice cubes

1.  Puree the mango and pineapple in a blender.

2.  Add yogurt, agave nectar, and ice cubes and blend until smooth.

Friday, May 24, 2013

What I Ate In Chicago

A couple of weeks ago, Mike and I took a trip to Chicago.  We've been there before for our first anniversary and we loved the city atmosphere.  This time, we went for our "babymoon"--we know that once our baby arrives in July, we won't be traveling much for a while, so this seemed like a good chance to get away.  We live about 3 hours away from Chicago, so we drove about halfway and then took the train the rest of the way.  We love to travel by train, and then we didn't have to worry about driving or parking in the city!

Our hotel was right on the Magnificent Mile, so after checking in, we headed out for lunch.  I had told Mike that I absolutely wanted to go to Chick-fil-a for lunch one day.  I got lucky and we headed there for lunch on Friday.  It was our first time eating there (the closest Chick-fil-a is 80 miles from our house) and it was everything we anticipated.  We both had a chicken sandwich (Mike's was spicy) and fries--I loved their fries!  I also really liked the addition of pickles on their chicken sandwich!
Melissa's Cuisine: What I Ate In Chicago

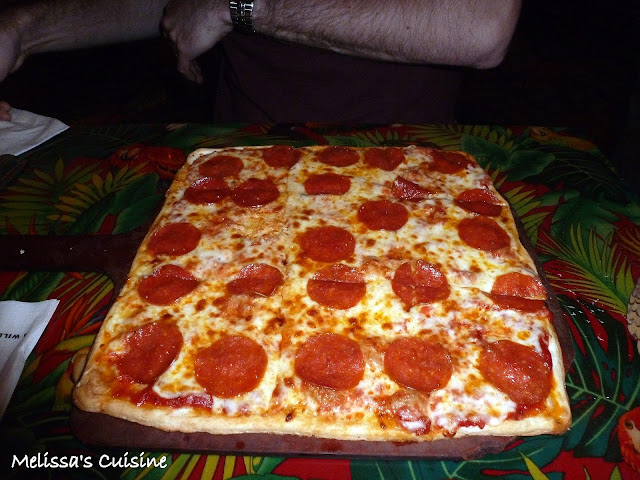
For dinner we headed to another restaurant neither of us had been to before, Rainforest Cafe.  Mike's co-worker is from Chicago and recommended that we eat at Rainforest Cafe for the experience.  Mike and I were both awestruck when we entered the restaurant.  We were greeted by a large snake, misting waterfalls, and enormous fish tanks.  We were seated next to the waterfall and ate our dinner alongside a parrot and family of gorillas.  I ordered one of their specialty items--the BBQ Bacon Cheeseburger. I loved the onion ring that was served on the burger (though I did eat it separately to make the burger size a little more manageable).  Mike ordered their Flying Dragon Pepperoni Pizza, the crust was thin and the amount of toppings was perfect.  Plus, it tasted good cold a few hours later!
Melissa's Cuisine: What I Ate In Chicago

Melissa's Cuisine: What I Ate In Chicago

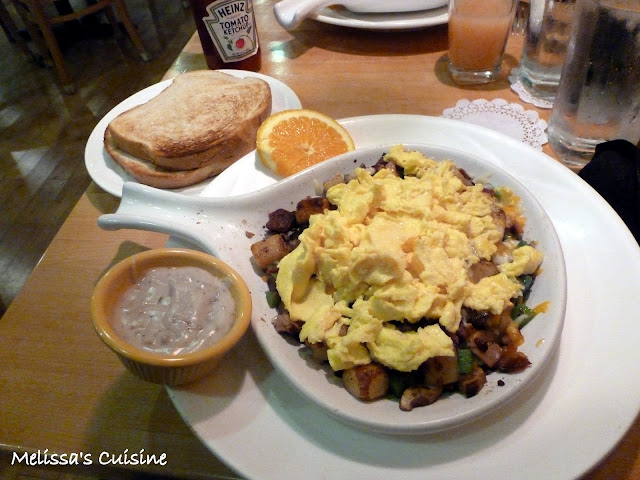
Saturday morning, we headed out to the restaurant voted number one for breakfast in Chicago, Yolk.  Being the breakfast lover that I am, I knew we had to pick a great place to eat breakfast.  I ordered the Peach Cobbler Crepes.  They were delicious, and the portion size was huge, but by time I finished I was sick of the orange flavor from the Grand Marnier.  Mike had the Countryside Skillet, which he really enjoyed.
Melissa's Cuisine: What I Ate In Chicago

Melissa's Cuisine: What I Ate In Chicago


After our enormous breakfast, we really were not hungry for lunch.  We did some shopping and walked down to the Navy Pier.  By this time it was about 3pm and we still hadn't eaten. We ended up stopping in the food court and Mike got McDonald's and I ordered a Chicken Gyro from Greek Delight.  It was delicious!  As you can imagine, we were not hungry for dinner.  We thought about just getting ice-cream from Ghiradelli's, however the cost and lack of seating deterred us from that plan.  We ended up heading back to our hotel and enjoying a couple drinks and appetizers at the M Avenue Lounge.  It was the perfect amount of food to satisfy us for the night.

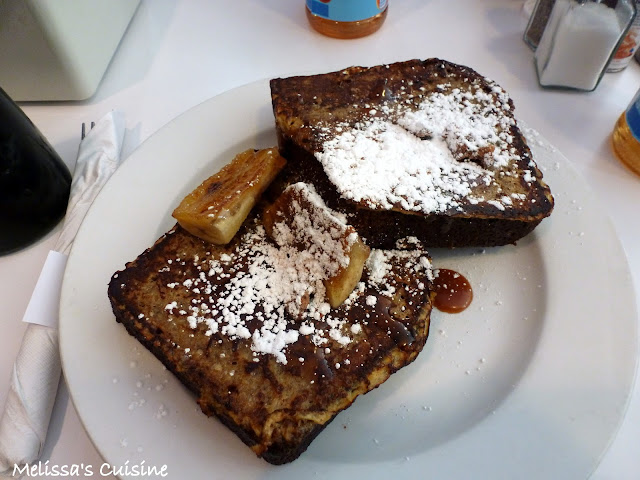
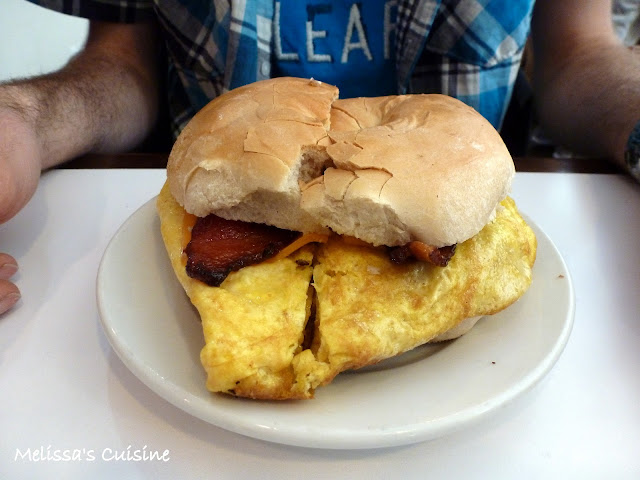
Sunday morning was Mother's Day, and we hadn't thought about that in advance, so the restaurant we wanted to go to was booked.  I had seen a restaurant as we were walking around that intrigued me, so we headed to e.leaven for breakfast.  This restaurant was more casual than we had anticipated, and we ordered at the front counter and our food was brought out to our table.  I ordered the Banana Bread French Toast--thick slices of banana bread topped with bananas.  It was delicious and so filling! Mike wanted something smaller than the day before, so he went with a breakfast bagel.  He really enjoyed his breakfast as well.
Melissa's Cuisine: What I Ate In Chicago

Melissa's Cuisine: What I Ate In Chicago
After breakfast, we packed up and headed back to the train station to head home.  We had a great weekend of relaxing, shopping, and eating great food!

Wednesday, May 22, 2013

Festive Marshmallow Treat Fruit Skewers

Melissa's Cuisine: Festive Marshmallow Treat Fruit Skewers
I absolutely love the summer holidays!  There is just something about them that makes me really look forward to Memorial Day, Independence Day, and Labor Day.  I think part of it has to do with having a day off of work when the weather is nice enough to be outside to enjoy it.  Plus, each of these holidays typically involves cook-outs and fireworks, two more things I love!
Melissa's Cuisine: Festive Marshmallow Treat Fruit Skewers
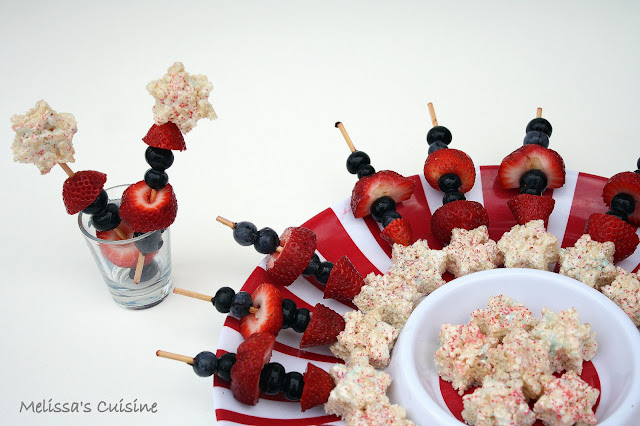
These festive fruit skewers were so fun to make, and they were fun to eat as well!  I actually made a bunch of them last summer for a Labor Day cook-out, but wanted to save the recipe to share when it was more relevant.  Now is that time!

I wanted the snacks to look like fireworks, but also incorporate the patriotic colors of red, white, and blue.  If you don't have red and blue sprinkles for the marshmallow treats, don't worry about it, there is plenty of red and blue from the fruits!

This is a snack that I think would be fun for children to assemble. Parents, just cut up the strawberries and marshmallow treats and let your kids have fun!  Not only will they enjoy putting these snacks together, you'll feel good about the fruit they're consuming when they get to eat their creations later.
Melissa's Cuisine: Festive Marshmallow Treat Fruit Skewers
Marshmallow Treat Fruit Skewers

Ingredients:
1 pan of marshmallow treats (recipe below)
1 quart of strawberries, washed and hulled
1 pint of blueberries
6" wooden skewers (if necessary, cut longer skewers in half)

1.  Cut marshmallow treats into star shapes using a cookie cutter. Set aside.

2.  Cut strawberries in half, width-wise.

3.  Thread the strawberries and blueberries onto the skewer, alternating strawberry half, 2 blueberries, strawberry half, 2 blueberries.

4.  Top the skewer with a marshmallow star.

These are best served the day they are made, otherwise the fruit and marshmallow treats become soggy.

Marshmallow Treats

3 Tablespoons butter or coconut oil
1 (10 ounce) package marshmallows
6 cups Rice Krispies cereal
red and blue sprinkles


1.  In a microwave safe bowl, heat butter (or coconut oil) and marshmallows on high for 1 minute, stirring after 30 seconds.

2.  Stir until smooth, returning to microwave in 30 second intervals if necessary.

3.  Add cereal to marshmallow mixture and stir until well coated.

4.  Press into a greased 9x13" pan.  Top with sprinkles.

Allow the marshmallow treats to cool before cutting.


Tuesday, May 21, 2013

Father's Day Man Cave Filler Giveaway


Can you believe that we are already half-way through May?  I certainly can't!  It seems this year has just flown by and I know the next few months are going to go even faster!

It's nearly June and that means that it is time to start thinking about Father's Day.  I already ordered my Dad his gift, I'm just (impatiently) waiting for it to arrive.  If you haven't bought your gifts yet, this is the perfect giveaway for you!  I've teamed up with a great group of bloggers to help promote the new blogging book "The Blogger's Survival Guide" and bring you this great giveaway. 

Not just one, but three people will win a cash prize.  Keep the money, give it to your dad, or use it to buy your Father's Day gift.  What you do with the money is your choice--just remember the more entries you make, the better your chances!  Good luck!
a Rafflecopter giveaway

Monday, May 20, 2013

Cosmic Brownies


Melissa's Cuisine: Cosmic Brownies
It was really no contest when it came to deciding which recipe I was going to make for this month's Secret Recipe Club.  As I browsed through Jess's list of recipes at Life's Simple Measures, I was immediately drawn to her recipe for Cosmic Brownies.  She has a plethora of delicious looking baked goods, but like I said once I saw this recipe, there was no turning back.

You see, one of the staples in Mike's lunch is a package of Cosmic Brownies.  He's been eating a package nearly every day since high school.  Really healthy, I know!  Actually, he hasn't had nearly as many since we've been married since I don't buy them for him all the time.  But when I saw a recipe so I could make them at home, I was sold!
Melissa's Cuisine: Cosmic Brownies
I made these brownies for dessert for our small group.  Everyone enjoyed them, but agreed that they are quite rich.  If you look at the picture below, you'll see that I did a really bad job of cutting the brownies into even squares.  However, it worked out in the long run because those small pieces on the edge were just the perfect size for brownies this rich!
Melissa's Cuisine: Cosmic Brownies
Cosmic Brownies

Makes 1 9x13" pan of brownies

Ingredients:
1 cup sugar
2/3 cup brown sugar
3/4 cup butter, melted
2 Tablespoons milk
2 eggs, room temperature
2 teaspoons vanilla
1-1/3 cup flour
3/4 cup unsweetened cocoa powder
1/2 teaspoon baking powder
1/4 teaspoon salt

1/2 cup heavy cream
8 ounces semi-sweet chocolate chips

1/4 cup chopped M&M candies (or topping of your choice)

1.  In a large bowl, whisk together the sugar, brown sugar, melted butter, milk, eggs, and vanilla.

2.  Add in the flour, cocoa powder, baking powder, and salt and stir until just combined.

3.  Pour the batter into a greased 9x13" pan.

4.  Bake at 350 for 18-20 minutes, until a toothpick inserted in the center of the brownie comes out mostly clean.  Allow the brownies to cool.

5.   While the brownies are cooling, make the ganache topping:  Pour heavy cream into a microwave-safe liquid measuring cup and microwave the heavy cream for 1 minute, until hot.

6.  Add chocolate chips to the hot heavy cream and allow it to sit for about 3 minutes.  Stir the chocolate chips into the cream until the mixture is smooth.

7.  Pour the ganache over the cooled brownies and sprinkle with chopped M&Ms.

8.  Refrigerate the brownies until you're ready to cut and serve.  Store brownies, covered, in the fridge.

Source: Life's Simple Measures

Friday, May 17, 2013

S'mores Bars

Melissa's Cuisine: S'mores Bars
Do you ever get started on making a recipe only to find out you're out a few key ingredients?  Yeah, that's happened to me a few times recently.  I blame pregnancy brain--I rarely run out of ingredients like flour and sugar, but last night I got started making some muffins and discovered I had less than a cup of sugar left!  Yikes!  Thankfully, I had a stash of vanilla sugar I was able to use, but still, who runs out of sugar?
Melissa's Cuisine: S'mores Bars

Mike and I recently became part of a couple's small group at our church.  We've started meeting together every other week, and we take turns hosting.  The hosts provide the main dish and the other two couples bring a side or dessert.  Last time, I offered to bring a dessert.  I had a specific dessert in mind that I wanted to make, but of course, I didn't have one of the key ingredients--Nutter Butter Cookies.  (And that's a hard thing to substitute!)  So I went to plan B, only to go to the basement pantry and discover that I was out of yet another key ingredient!  Fail.

Melissa's Cuisine: S'mores Bars
So I continued on to find a dessert that I knew I had everything in the house for.  This time I was successful!  They say the third time's the charm, and that certainly was the case with this dessert.  I had pinned these S'mores  Bars a while back and I'm so glad that I finally got around to making them.  They were the perfect combination of crunchy, sweet, and gooey!  Our small group loved these bars and I see them making their appearance at many events this summer!

Melissa's Cuisine: S'mores Bars
S'mores Bars

Makes 16 bars

Ingredients:
3/4 cups graham cracker crumbs
4 Tablespoons butter, melted
3/4 cup sugar
1/2 cup brown sugar
1/2 cup butter, softened
1 egg
1/2 teaspoon vanilla
1-1/4 cup flour
1/2 teaspoon baking soda
1/2 teaspoon salt
1 cup chocolate chips
3/4 cup mini marshmallows, divided
1 regular sized Hershey chocolate bar

1.  Line an 8x8" pan with parchment paper.

2.  In a small bowl, combine graham cracker crumbs and melted butter.  Place in the bottom of the prepared pan and press down to form a crust.

3.  In a medium bowl, beat the softened butter and sugars until fluffy.

4.  Add in the egg and vanilla and mix.

5.  Add flour, baking soda, and salt to the wet mixture and mix until combined.

6.  Fold in chocolate chips and marshmallows until evenly distributed.

7.  Spoon the cookie dough on top of the graham cracker crust as evenly as possible.  (I found it was easier to use my fingers to flatten it out.

8.  Bake at 350 for 20-23 minutes, until the bars are set.

9.  About 5 minutes before the bars are done baking, sprinkle the marshmallows on top and return the bars to the oven to finish baking.

10.  Break the chocolate bar into pieces and place on top of the baked bars.  Let the bars cool completely before cutting.

Source: Chocolate, Chocolate, and More

Wednesday, May 15, 2013

Breakfast Pizza


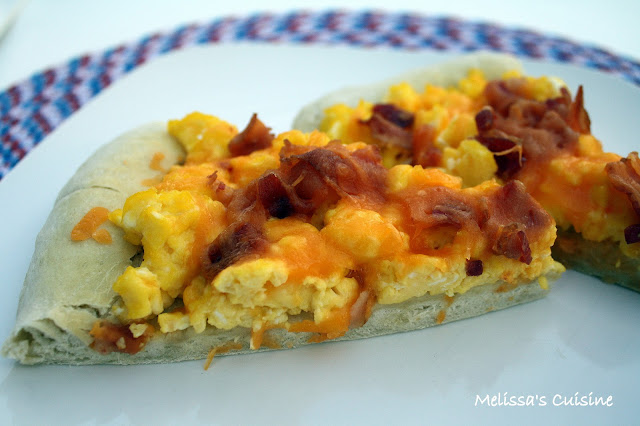
Melissa's Cuisine: Breakfast Pizza with Eggs and Bacon
How often do you eat breakfast for dinner?  Mike and I have breakfast for dinner at least once a week.  Our go-to meal is an omelet, but I've been known to whip up a batch of pancakes or French toast if we have the time.

One of the best things about breakfast for dinner is how simple it is.  Plus, if you have any leftovers, they make a great breakfast!  Pot roast for breakfast...not so much...

I'm really excited to work with I Can't Believe It's Not Butter for their Breakfast After Dark campaign.  Not only have I been a ICBINB fan for years (I love their spray), but I just love anything that has to do with breakfast.
Melissa's Cuisine: Breakfast Pizza with Eggs and Bacon
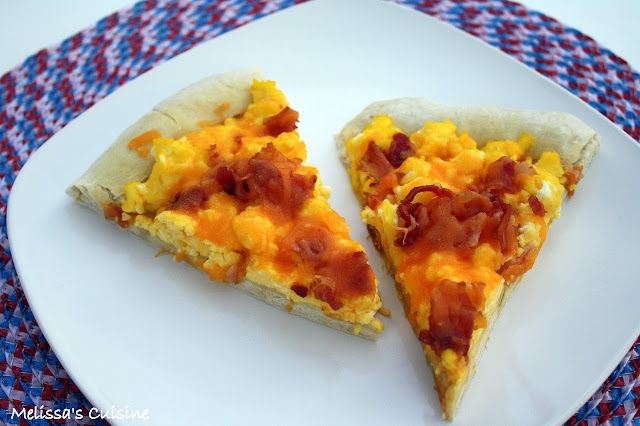
I wanted to take a step back from our typical breakfast for dinner recipes and come up with something different.  I have to give credit for the inspiration for this recipe to Mike's co-workers.  He told me a couple weeks ago that they were talking about having breakfast pizza when they had to work a Saturday.  They were disappointed that there are no local restaurants that make or deliver breakfast pizza.  That got me thinking, and I decided one of these days I'll make a few breakfast pizzas to take over on a Saturday morning.  But first, I had to perfect the recipe.

I used a new pizza dough recipe for this breakfast pizza, and I substituted the olive oil with melted I Can't Believe It's Not Butter. I Can’t Believe It’s Not Butter has 70% less saturated fat than butter, no hydrogenated oils and is made from a blend of vegetable oils. It's a product that I feel good about eating, and serving to my family.
Melissa's Cuisine: Breakfast Pizza with Eggs and Bacon
If you are interested in viewing some breakfast recipes or finding your own inspiration for Breakfast After Dark, I suggest checking out I Can't Believe It's Not Butter's webisodes and recipe collection. The toasted breakfast burrito is calling my name!

Breakfast Pizza

Ingredients:
1 cup warm water, approximately 110 degrees
1-3/4 teaspoons yeast
3/4 teaspoon honey
1-1/2 Tablespoons I Can't Believe It's Not Butter, melted
3-1/4 cup flour
1-1/2 teaspoons salt

8 slices of bacon, cooked and crumbled
8 eggs, scrambled
1 cup shredded cheddar cheese

1.  Pour the warm water into the bowl of your stand mixer.

2.  Sprinkle yeast on top of the water and pour in the honey.  Allow the mixture to sit, untouched for 5 minutes.

3.  Add melted ICBINB, flour, and salt and mix on low speed until the dough pulls away from the side of the bowl.

4.  Increase the mixer speed and knead for 5 minutes.

5.  Spray the top of the dough with cooking spray and cover the bowl with plastic wrap.  Set in a warm spot and allow it to rise for 2 hours. (See note**)

6.  Punch the dough down and press it onto a greased pizza pan.

7.  Poke the dough with a fork to avoid air bubbles.

8.  Bake the crust at  375 degrees for 15 minutes, until the crust is lightly browned.

9.  Remove the crust from the oven and top with scrambled eggs, crumbled bacon, and shredded cheddar cheese.

10.  Return the pizza to the oven for approximately 5 minutes, until the cheese is melted.

**Note:  I made the pizza dough the night before, as this meal was served for dinner (I knew I wouldn't have time to make the dough after work!).  I mixed the dough after dinner and then allowed it to rise for 2 hours and then punched it down.  I refrigerated the dough in the bowl overnight.  Then, when I needed the dough, I pulled it out of the fridge and let it come to room temperature (about an hour--but I was able to fry the bacon and scramble the eggs while waiting) before rolling it out.

I was selected for this opportunity as a member of Clever Girls Collective and the content and opinions expressed here are all my own.

Monday, May 13, 2013

Sparkling Strawberry Lemonade

Melissa's Cuisine: Sparkling Strawberry Lemonade
Spring has finally arrived and I am loving the warmer weather!  The scene above is where you can typically find me in the evenings.  Since Mike goes to bed so early, the dog and I have taken to heading outside so he can play and I can relax.  Few things are better than a sunny evening accompanied by man's best friend, a good magazine, and a cold drink.
Melissa's Cuisine: Sparkling Strawberry Lemonade
I have to give Mike a lot of credit for the idea behind this drink.  A few months ago, we were at the movies and he was ordering pop and popcorn for us.  Knowing that I have to limit the amount of caffeine that I drink, he ordered a "special" drink for us to split.  He asked the concessions worker to mix lemonade and Sprite together, and it was delicious!  It has now become our go-to drink when we go to the movies.

We were at the store a couple weeks ago and I saw a new flavor of Sierra Mist--Strawberry Kiwi.  It sounded really good, so I picked up a bottle.  Later that day, Mike and his friend were working on my car's brakes and I wanted to make something refreshing for them to drink.  I thought of the Sierra Mist and then our special movie drink.  I decided I would make a big pitcher of Sparkling Strawberry Lemonade.

I happened to have some fresh strawberries and a lemon in the house, so I figured it would add those into the drink.  (Side note--be sure to wash your lemon before cutting it!)  The men really liked this drink, and I enjoyed it too!  I am sure this drink will be a staple in our house this summer!
Melissa's Cuisine: Sparkling Strawberry Lemonade
Sparkling Strawberry Lemonade 
 
Serves 8

Ingredients:
1 quart lemonade (homemade or store-bought)
1 lemon, sliced
5 strawberries, sliced
2 cups Strawberry Kiwi Sierra Mist (you can use plain Sierra Mist, if necessary)

1.  In a large pitcher, combine the lemonade, lemon, and strawberries.  Refrigerate until you're ready to serve the lemonade. (The longer this mixture sits, the stronger the strawberry flavor will be.)

2.  Right before serving, pour the Sierra Mist into the lemonade. 

3.  Serve over ice, if desired.

*If you are planning to serve the lemonade immediately after preparing it, go ahead and add the Sierra Mist right away.  I just recommend waiting to add the Sierra Mist until you're serving the drink so that it doesn't go flat. 

Friday, May 10, 2013

S'mores Banana Bread Cake

Melissa's Cuisine: S'mores Banana Bread Cake
Are you a camper?  Growing up, camping was something we looked forward to every summer.  My family would typically spend a week camping in either Canada or Kentucky.  We'd also spend a couple weekends at local campgrounds.  And, if we took a vacation, we usually camped out instead of staying in a hotel.  It was a big deal for us when we finally upgraded from a tent to a pop-up camper!

Mike's family also enjoyed camping.  However, their version of camping was quite a bit more upscale than what I was used to!  They had a large trailer and would typically just go to local campgrounds.  Regardless, camping is something that both Mike and I love to do.

Mike's cousins have started a tradition of camping at a family campground each summer.  Last year and the year before, we were able to borrow Mike's parents' trailer and spend the weekend with everyone.  We had such a good time and made so many memories.  Mike and I own a tent and would love to go camping with a group of friends, but that's going to have to wait until next year...
Melissa's Cuisine: S'mores Banana Bread Cake


One of my favorite things about camping is making s'mores.  It's just not camping unless you build a big fire, roast marshmallows, and put together a s'more.  There's just something about the golden brown marshmallow melting a big piece of chocolate between two graham crackers that I just love!  While I like traditional campfire s'mores, I also enjoy making other treats into s'mores.  (Like S'mores Puppy Chow, Mess-less S'mores, S'mores Bark...oh, I love s'mores!)

This time I decided to put a s'mores twist on banana bread.  This bread recipe is from my mom and it's my absolute favorite banana bread recipe.  I added a good amount of chocolate chips to the batter.  Then, once the bread was done baking, I topped it with a generous amount of marshmallows and put it under the broiler to roast the marshmallows.  The result was out of this world!
Melissa's Cuisine: S'mores Banana Bread Cake

S'mores Banana Bread Cake

Serves 16

Ingredients:
1 cup sugar
1/3 cup butter, softened
2 eggs
1-1/2 cup mashed bananas (3-4 bananas)
1/3 cup water
1-2/3 cup flour
1 teaspoon baking soda
1/2 teaspoon salt
1/4 teaspoon baking powder
1 cup chocolate chips
2 cups mini marshmallows

1.  In a large mixing bowl, cream together the sugar, butter, and eggs.

2.  Mix in the bananas and water.

3.  Add in the flour, baking soda, salt, and baking powder and stir until the dry ingredients are incorporated.

4.  Stir in the chocolate chips.

5.  Pour the batter into a greased 8x8" cake pan.

6.  Bake at 350 for 65-70 minutes, or until a toothpick inserted in the center of the cake comes out clean.

7.  Spread mini marshmallows on top of the cake immediately after it comes out of the oven.

8.  Place under the broiler for approximately 2 minutes, until the marshmallows are toasted.  Be sure to keep an eye on them so they don't burn!

9.  Allow the cake to cool completely before slicing into it.

Cover and store at room temperature.

Wednesday, May 08, 2013

Greek Pitas

Melissa's Cuisine: Greek Pitas
I love Greek food. I don't really know when my obsession started, but I know that given the choice, I could eat gyros and tzatziki almost every day!  Then throw in a couple days of pizza and I'm a happy camper!

Last year, a new restaurant opened in my hometown.  (It feels weird to call it my hometown when I live only 25 minutes away!)  They specialize in Greek and Mediterranean food.  Their portion sizes are huge and Mike and I love going there.  I remember commenting to Mike once that I wished we had a gyro restaurant closer to our house.  Then, I found out that we did!  It's a little building placed in a random spot (between two car lots), but the food is phenomenal!  We've gone a couple times and every time we drive by I try to get Mike to stop (most of the time I'm unsuccessful though!)
Melissa's Cuisine: Greek Pitas
When I came across this recipe for Greek pitas, I knew I had to make them!  They look so incredible.  Now, these aren't the kind of pitas that have the pockets that you stuff, these are more like a flatbread.  They were easy to make and the perfect soft and chewy texture.  I cut up pieces of grilled Sweet & Spicy chicken, added some pickles and cheese, and folded that up in one of these pitas.  It was absolutely delicious! 

We had leftover pitas, so I stored them in the fridge so we could have them for lunch throughout the week.  I used two pitas like bread slices and packed a sandwich full of meat and cheese for Mike.  He said it was delicious and very filling.  I think these pitas would also make a delicious base for mini pizzas!

Since I've shared the main course with you so far this week (the chicken and these pitas), be sure to come back on Friday and I'll share dessert!
Melissa's Cuisine: Greek Pitas
Greek Pitas

Makes 10 6" pitas

Ingredients:
1-1/8 cup warm water
2-1/4 teaspoons yeast (or 1 packet)
2-1/3 cups bread flour
1 teaspoon salt

1.  Pour the warm water into the bowl of your stand mixer and sprinkle the yeast on top.  Allow the mixture to sit for about 5 minutes, until the yeast poofs up.

2.  Stir in the flour and salt and knead with the dough hook attachment for 5-7 minutes, until the dough is smooth and elastic. 

3.  Cover the bowl with plastic wrap and set it in a warm spot to rise until double, about an hour.

4.  Punch the dough down and allow it to rest for 10 minutes.

5.  Divide the dough into 10 equal sized pieces. **

6.  Shape each dough piece into a ball and let them rest for 15 minutes.

7.  Heat a large skillet or griddle over medium heat. Lightly brush the pan with oil if it's not a non-stick pan.

8.  Press each dough ball into a 6" disk.  I found it was easiest to flatten the ball between my palms and gently press it down with my fingers until a disk was formed.

9.  Place 2-3 dough disks on the hot skillet, being careful not to overcrowd.  (You may be able to fit more or less depending on the size of your pan).

10.  Cook for 3-4 minutes, until golden brown on one side.  Then flip and cook for 2-3 minutes, until the other side is golden brown as well.

11.  Place cooked pitas on a plate and cover with a towel to keep them warm (and soft).  Repeat steps 9 & 10 with remaining dough disks.

Serve the pitas warm.  Store leftovers in a Ziploc bag in the fridge.

**Note:  I thought the size of these pitas was quite small.  I would recommend making 6 10" pitas instead, but you can choose the size that fits your needs best.

Source: Soliloquy Of Food & Such

Monday, May 06, 2013

Sweet & Spicy Chicken Rub

Melissa's Cuisine: Sweet & Spicy Chicken Rub
The weather has finally caught up with the calendars here in Michigan!  I could not be happier!  After an early spring last year, it felt like winter was dragging on this year.  Then last week, the temperatures soared into the 70's and have stayed there ever since.  I'm so thankful for the warm weather--spring is finally here!

One of my favorite parts about spring is that it is finally warm enough to pull out the grill.  I love grilling food, and when the weather is nice, most of our food is cooked outside.  This year, I was so excited to start grilling that I even went and got a new propane tank (instead of asking Mike to do it).  A big thanks to the kind worker who helped the pregnant lady out so I didn't have to carry the heavy tank.  Something about pregnancy brings out the nicest people :)

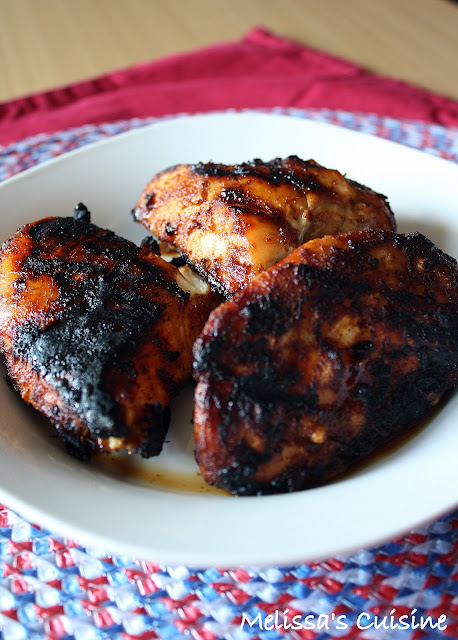
Anyway, this chicken rub is delicious!  I made it first a few weeks ago when we had our small group over for dinner.  At that time, the weather was not cooperating, so I cooked the chicken in the oven.  Everyone commented on how flavorful the chicken was.  I knew it was a winner because Mike didn't put barbecue sauce on his chicken, and typically he won't eat chicken without a dipping sauce!  This time, I grilled the chicken.  I love the added flavor from the grill.  The sugar will caramelize on the chicken and leave you with a nice crunchy exterior.  I think I've found my go-to chicken recipe!

Melissa's Cuisine: Sweet & Spicy Chicken Rub

Sweet and Spicy Chicken Rub

Serves 4

Ingredients:
2 Tablespoons brown sugar
1 Tablespoon paprika
2 teaspoons onion powder
1-1/2 teaspoon salt
1 teaspoon chili powder
4 chicken breasts

1.  In a large ziploc bag, combine the brown sugar, paprika, onion powder, salt, and chili powder.

2.  One at a time, add the chicken breasts to the bag and shake to coat thoroughly with the seasonings.

3.  Grill chicken about 7 minutes per side, until the interior temperature reaches 170 degrees.

Sunday, May 05, 2013

Amazon Gift Card Giveaway!

I'm really excited to be teaming up with a great group of bloggers to bring you this giveaway today!  This was the brainchild of Lisa, from Wine & Glue, as a way to celebrate her birthday this week.  Happy birthday Lisa!  And, we all get to celebrate with her.
Image Map

Who couldn't use an Amazon giftcard?  I know I could find all kinds of things to spend $250 on.  I'd start with a few small kitchen gadgets, maybe a couple DVDs I've been wanting, and then I'd move on to baby stuff.  I mean, have you seen the cute baby girl items out there?  I could spend the whole $250 just on clothes for her!  But, I can't win this giveaway, so I sure hope you can!

The contest ends on Friday, May 10 and the winner will be announced shortly afterwards.  Be sure to enter properly and with your correct information.

What would you buy with $250 to spend at Amazon?

a Rafflecopter giveaway

Friday, May 03, 2013

French Toast Rollups

I seem to have breakfast on the brain lately.  Have you seen my Pinterest account?  I think half of the recipes I pinned this week were for breakfasts!  Not to mention, I did post a breakfast recipe the other day.  Have you checked out my Biscuit Waffles yet?  They take just 10 minutes to make and they're so good!  Go ahead and check them out, I'll wait...

Okay, back to today's recipe.  I saw this idea when I was browsing my assigned blog for last month's Secret Recipe Club.  I didn't have time to make it before the posting date, but I knew I would have to soon!


The original recipe brought back memories of breakfasts when I was in Romania.  I remember waking up in the morning to the smell of fresh crepes baking.  When I came out of my room, the table was filled with homemade crepes and a jar of Nutella spread (or the Romanian equivalent) and fresh fruit.  We smeared Nutella on the crepes and rolled them up to eat.  I loved the breakfast so much, I think my hostess made it for me a couple times a week!

This recipe combines the idea of Nutella on crepes along with French Toast.  Really, how can you go wrong with that combination?  I decided to mix it up a little bit and do some of these with Nutella, others with Peanut Butter, and still others with homemade strawberry freezer jam.  I had a really difficult time choosing a favorite, but the sweetness of the Nutella really made those rolls stand out to me!


French Toast Rollups

Makes 12 (approximately 4 servings)

Ingredients:
1/2 cup milk
1 large egg
1 teaspoon pure vanilla
12 sandwich bread slices
Nutella, Peanut Butter, and/or Jam
4 tablespoons butter, divided
1/4 cup powdered sugar
1.  In a shallow bowl, whisk together the milk, egg, and vanilla.  Set aside.
2.  If desired, remove the crusts from the bread.  (I was lazy and left mine on.)  Using a rolling pin, flatten the bread.
3.  Spread Nutella (or your choice of filling) onto bread slices and roll up, pinching the seam to seal.
4.  Place 2 Tablespoons of butter into a skillet or frying pan and melt over medium heat.
5.  Dip the bread rolls in the egg mixture and place them in the frying pan.  I worked in batches of 6.
6.  Cook the rollups until golden brown, rolling them around as need to ensure even cooking (about 4 minutes total).
7.  Melt remaining butter and cook remaining rollups.
8.  Dust the rollups with powdered sugar and serve warm.
Source: Diethood

Wednesday, May 01, 2013

Arby's Roast-Beef-atopia!

This post brought to you by Arby's. All opinions are 100% mine.

Arby's holds a special place in my heart...  When I was in high school, our band took a Spring Break trip to Florida where we got to perform at Disney.  The bus trip was something like 24 hours long and I remember one of the stops we made was at Arby's.  My friends convinced me to try a Jamocha shake and my life was changed.  Okay, maybe that's a little over-dramatic, but after living 16+ years hating coffee, I was surprised that I loved the Jamocha shake (but I still don't like coffee!).  From that time forward, my standard order at Arby's was a roast beef sandwich, curly fries, and Jamocha shake.  I still love that combination today!

For a limited time, Arby's is offering a twist on one of my staples--the roast beef sandwich.  They're upping the ante and pairing King's Hawaiian Rolls with their roast beef sandwiches. 

Their new sandwiches are served hot and fresh to order.  Here are their new choices:

  • Arby’s KING’S HAWAIIAN roast beef sandwich: Comes with an extra helping of freshly sliced roast beef, piled high on a soft and slightly sweet King's Hawaiian Bun.
  • Arby's King's Hawaiian Roast Beef and Swiss Sandwich: Has the same extra helping of freshly sliced roast beef and King's Hawaiian Bun, topped with Swiss cheese, crunchy pickles, and creamy Dijon spread.


Their two new sandwiches sound fantastic--I haven't decided which one I'll be trying first!Their two new sandwiches sound fantastic--I haven't decided which one I'll be trying first!  (Though the pickles in the Beef and Swiss Sandwich are calling my name!)

To celebrate their partnership with King's Hawaiian, Arby's is hosting a Hawaiian Getaway Sweepstakes.  Oh, how I would love to go back to Hawaii!  The grand prize winner will receive a round trip for two, with four nights stay in Honolulu, Hawaii.  They will also receive a premium group lesson at one of the island's premier surf schools, Hawaiian Fire.  (How cool is that?!?!)  For more details, and to enter the contest, visit Arby’s Hawaiian Getaway Sweepstakes from April 29 through May 26.

I hope you'll stop by Arby's and try one of their new Arby's King's Hawaiian sandwiches.  And, don't forget to enter their sweepstakes--I hope you win!

Visit Sponsor's Site

01 10 11 12
Blogging tips