The added ingredients in this applesauce take it from everyday to gourmet!
Have you ever been apple picking? Until 3 years ago I hadn't! Considering that Michigan is one of the top apple growing states, I am surprised it took me so long! Last year unseasonably warm temperatures followed by a freeze damaged the apple crops so severely we were unable to pick apples because there weren't any! This year the weather cooperated and there are plenty of apples to be picked.
Mike, Summer, and I headed out to a nearby apple orchard with some of our friends and their baby girl. Of course our daughters are much too young to help (or remember our adventure!), but we wanted to include them in our families' tradition. We picked 3 kind of apples: Honeycrisp, Cortland, and Empire. The Honeycrisp are my favorite for eating. The Empire apples were enormous and perfect for this applesauce; I threw in a few Cortland apples as well.
This applesauce goes beyond my typical applesauce recipe which includes one ingredient: apples. I really enjoyed this recipe because it seemed extra special. The best part about this recipe is that it's made in the Crock-pot. No standing over the stove stirring a pot of apples. Just put everything in the slow cooker, turn it on and walk away. Your house will smell amazing!
Applesauce
Serves 8
Ingredients:
6 apples, peeled, cored, and diced
1 cup apple cider
2 Tablespoons butter
3-6 Tablespoons honey (adjust for how sweet you prefer your applesauce)
1/2 teaspoon cinnamon
1/4 teaspoon nutmeg
1. Combine all the ingredients in your slow cooker.
2. Cook on low for 6-8 hours, until apples are soft.
3. Using an immersion blender, mash the apples to your desired consistency. (You can also use a blender, food processor, or a potato masher.)
Serve warm. Store leftovers in an airtight container in the refrigerator.
Ingredients source: Culinary Concoctions by Peabody
Wednesday, October 30, 2013
Monday, October 28, 2013
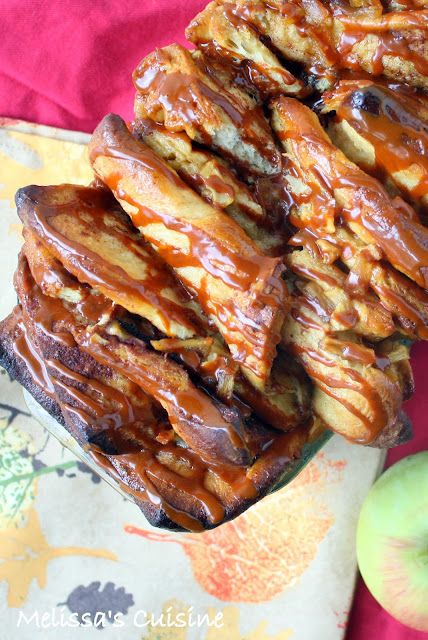
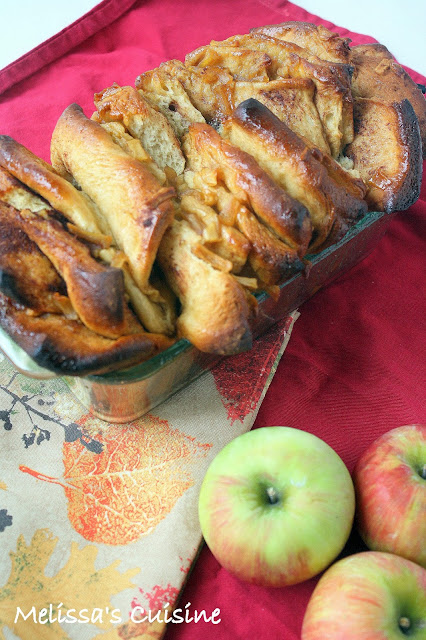
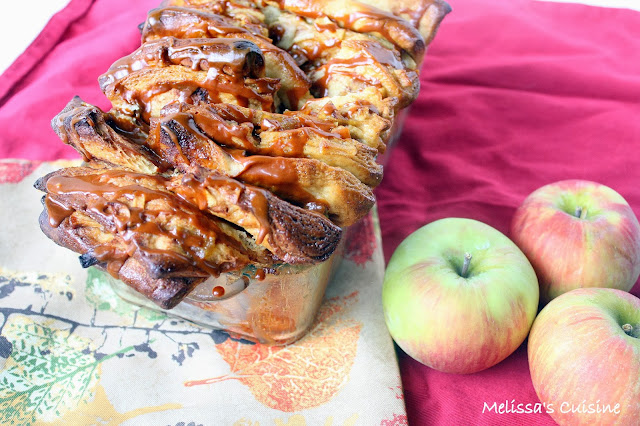
Caramel Apple Pull Apart Bread
This fall flavored pull apart bread is filled with apples and caramel. It is a family favorite!
Are you a bargain shopper? I totally am! Ever since I began grocery shopping (even while still living with my parents) I have loved clipping coupons and hunting for the best possible deals. And, I've snagged some great ones! I've made it into a game for myself, always competing to get the best deal, and the highest percentage of savings (check out the time I saved 95%!) While I don't spend as much time couponing as I used to (before Summer was born), I still enjoy searching out the best deals and getting that savings high.
So, that's why I am excited to tell you about my new affiliation with Eversave. It's a daily deal site with some fantastic deals! Since becoming a member a couple months ago, I have saved hundreds of dollars. It's easy--just visit their website to check out the daily deals. Then purchase the deal and check your email for the voucher. They have something for everyone: I've purchased baby items, toys, canvas prints, even a vacation! Plus, they have one of the best referral and rewards programs out there: for every new customer you refer, you receive a $10 credit, and if you simply share a deal after you purchase it, you receive a $2 credit. Those credits add up and make the deals even better!
I'll be posting the daily deals on my Facebook page, so I hope that you will check it out! The holiday season is quickly approaching, and think of how much money you can save. Just an example: today's featured save is an Android Tablet and it is 83% off. Or how about a 2 night vacation plus a restaurant gift card at a savings of 80%. Plus, there are local deals based on where you leave. Check it out today and start saving!
Okay, now let's talk about this bread. Wow. All the best flavors of fall packed into a bread pan. Can it get any better? I'd have to say no, especially if you base taste on how quickly something is eaten. This loaf of bread lasted about 2 days in our house!
It may look complicated, but don't let the instructions scare you off. This bread is pretty simple to make, though it can be time consuming because you need to wait for the dough to rise. While the dough is rising, you can work on the caramel apple filling though, so the time passes rather quickly. The caramel apple filling seeps between the pieces of the bread, ensuring that every bite is filled with the flavors of fall. Then, the bread is topped off with a caramel apple icing.
This bread is fall in a loaf pan!
Pull Apart Cinnamon Bread
Makes 1 loaf
Ingredients:
For the dough:
2-3/4 cups flour, plus more if needed
1/4 cup sugar
2-1/4 teaspoons instant yeast
1/2 teaspoon salt
4 Tablespoons butter
1/3 cup milk
1/4 cup water
1 teaspoon vanilla
2 large eggs
For the filling:
4 Tablespoons butter
1 cup sugar
2 teaspoons cinnamon
For the caramel filling:
4 Tablespoons butter
1/2 cup brown sugar
1/2 teaspoon cinnamon
2 apples, diced
For the icing:
1 cup powdered sugar
1-1/2 Tablespoons apple cider
1 packet Duncan Hines Caramel Frosting Creations
1. In the bowl of your mixer, combine flour, sugar, yeast, and salt.
2. In a small saucepan, combine the butter and milk and heat until the butter melts. Set aside and cool until it reaches 115-120 degrees.
3. Add the milk mixture, water, vanilla, and eggs to the flour mixture. Mix on low speed with the dough hook until a dough forms.
4. Add additional flour 1 Tablespoon at a time, as needed, until the dough pulls away from the edge of the bowl. Continue kneading bread until it becomes smooth and elastic, about 3-5 minutes.
5. Cover the dough and set it aside to rise until doubled, about 1 hour.
6. While the dough is rising, add butter to a small saucepan and melt. Set aside.
7. Mix sugar and cinnamon in a small bowl. Set aside.
8. Next, in a small saucepan, melt 4 Tablespoons butter and add the brown sugar. Cook until bubbly and the mixture begins to thicken.
9. Add the diced apples to the caramel mixture and set aside.
10. When dough has risen, transfer it to a lightly floured surface and gently deflate.
11. Roll dough into a ball, cover with a clean towel, and let it rest for 5 minutes.
12. Roll the dough into a rectangle, approximately 12" by 20".
13. Brush the dough with the melted butter. Sprinkle evenly with the cinnamon sugar mixture, be sure to use all of it.
14. Cut the dough length-wise into 4 long strips.
15. Stack those strips on top of each other and cut into 6 equal slices.
16. Stack all the slices on top of each other and place vertically in a greased bread pan.
17. Pour the caramel apple mixture on top of the dough. Gently separate the pieces of dough to allow the caramel mixture to seep between the slices.
18. Cover with a clean towel and set aside to rise for 30 minutes.
19. Set the loaf pan on a cookie sheet (in case the caramel bubbles out of the pan). Bake at 350 for 45-50 minutes, until the top is golden brown. If the top is getting too dark before the bread is baked, cover with foil.
20. Remove from oven and let the bread cool in the pan for 20 minutes. Run a knife around the edge of the bread to loosen it from the pan and turn it onto a serving plate.
21. While the bread is cooling, combine powdered sugar, milk, and Caramel Frosting Creations in a small bowl to make a thin icing. Drizzle on top of bread after it has been turned onto the plate.
This post contains affiliate links.
Friday, October 25, 2013
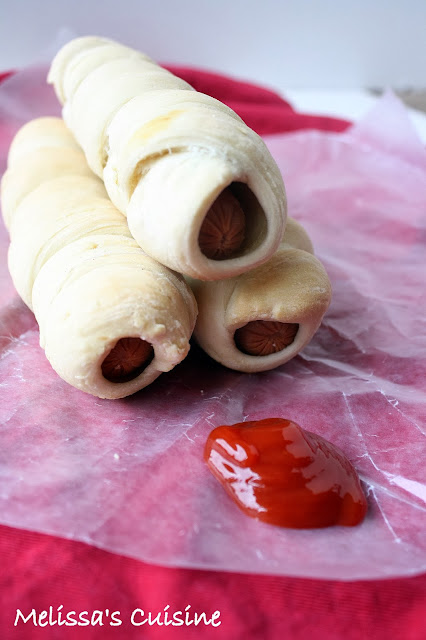
Pretzel Dogs {Flashback Friday}
So, remember the other day I told you that snow was in the forecast? Well, I hate to admit it, but the meteorologists were correct. I woke up yesterday morning to a snow covered lawn and branches down because of the weight of the snow! You can check out a picture on my Facebook page.
I love how snow looks, but there is something just nor right about having the brilliant fall colored trees covered in snow. The one good thing about snow means that we're closer to the Holiday season, which I love! If you're getting ready for the Holidays already, you might want to check out these LED Light Strings.
Today's Flashback Friday recipe is Pretzel Dogs. These pretzel wrapped hot dogs are my idea of comfort food! They aren't something I make often, but they are always a family favorite when I do make them. They are simple to make, and you could make them for Halloween and serve them as Mummy Dogs!
Yikes...talking Christmas and Halloween in the same post? I'm as bad as television commercials!
Get the recipe: Pretzel Dogs
This post contains an affiliate link.
Wednesday, October 23, 2013
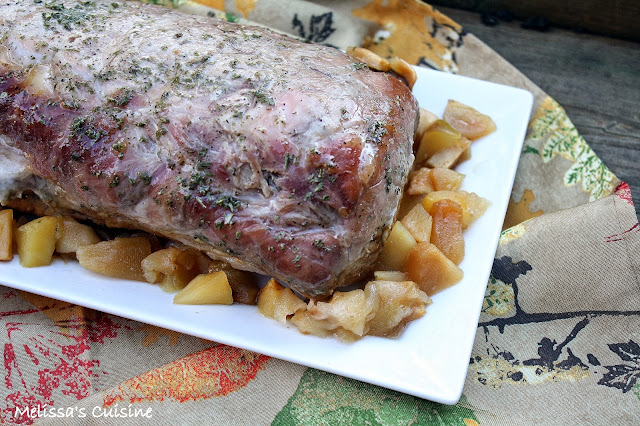
Apple Glazed Pork Loin
They are predicting snow this week. Seriously. I know it's almost the end of October, but I am just not ready for that S-word! So far, it hasn't happened. I'm okay with the cold temperatures, but I'd like to enjoy fall while it's here. As I've mentioned before, I love the flavors of fall.
For some reason, I think of pork loin as a fall food. Maybe it's because it's something cooked in the oven and I tend to not use my oven very much in the summer. I came across this recipe via Pinterest and knew it was the perfect fall dinner. I made it for our small group, and I think it was a hit with everyone! The apple glaze over the pork really makes this meal something special. We had leftover pork, so a few nights later, Mike and I shredded the meat and let it sit in the apples and juices. Then we put it on toasted buns, and had some of the best pulled pork ever!
Apple Glazed Pork Loin
Serves 8-10
Ingredients:
1 Tablespoon olive oil
1 4 pound pork loin
salt
pepper
parsley
1/2 onion, diced
2 apples, peeled and diced
1/2 cup apple cider
1 cup apple jelly
2 Tablespoons balsamic vinegar
1. Heat olive oil in a large skillet. Add the pork loin and brown on all sides.
2. Remove the pork loin from the skillet and place in a 9x13" baking dish. Season with salt, pepper, and parsley.
3. In the same skillet, saute the onion and apples until the onions are translucent, about 5 minutes.
4. Add the apple cider and bring the mixture to a boil.
5. Pour the cider mixture into the baking dish, around the pork loin.
6. In a small bowl, combine the apple jelly and balsamic vinegar until there are no lumps. Spread the jelly over the pork loin.
7. Bake at 350 for 1 hour and 20 minutes, until the internal temperature reaches 170 degrees. (Plan to cook the pork loin for approximately 20 minutes per pound.)
8. Allow the pork to sit for about 10 minutes before slicing. Serve the pork with apples on top.
If you have leftovers, shred the pork and allow it to sit in the apple juice. It makes great sandwiches!
Source: Join Us, Pull Up A Chair
Monday, October 21, 2013
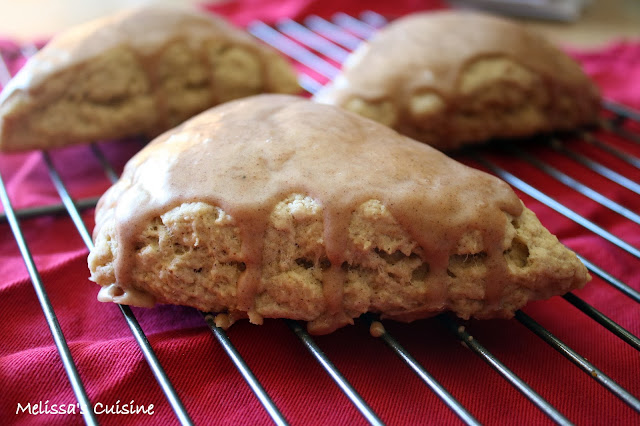
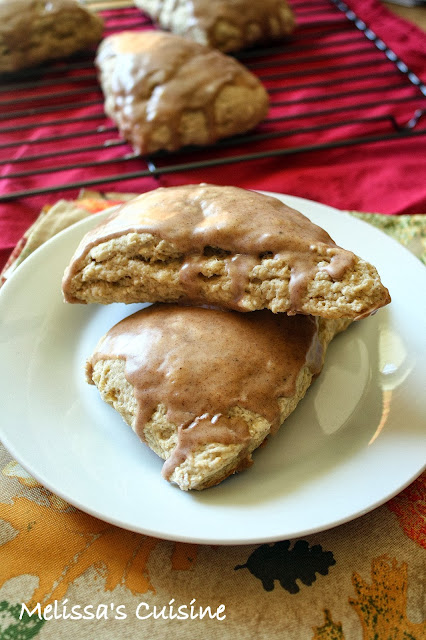
Pumpkin Scones
How is it possible that it is already time for October's Secret Recipe Club reveal? Cliche, I know, but I can't believe how quickly this
year has passed. Halloween is already next week and before we know it,
it will be Thanksgiving and then Christmas!
I am not complaining though, I absolutely love this time of the year! I especially love the flavors of the seasons, specifically apples and pumpkin. Last month I hit the jackpot with a delicious apple recipe, a Rustic Apple Galette.
This month, I was assigned to Heather's blog, It's Yummy to My Tummy. I set out to find another recipe that would is the flavors of the season. When I came across this recipe for Pumpkin Scones, I knew this was the recipe I would be making.
These scones came together in a flash. I made a few adjustments to the recipe, using heavy cream in place of half and half as I find cream makes scones tender, and I only made the spiced icing rather than 2 icings. I loved these scones. They were full of flavor and absolutely delicious alongside a hot cup of apple cider for breakfast or a snack.
Pumpkin Scones
Makes 8 scones
Ingredients:
2 cups flour
1/2 cup sugar
1 Tablespoon baking powder
1/2 teaspoon salt
1/2 teaspoon cinnamon
1/2 teaspoon nutmeg
1/4 teaspoon cloves
1/4 teaspoon ginger
6 Tablespoons butter
1/2 cup pumpkin puree
3 Tablespoons heavy cream
1 egg
1-1/4 cups powdered sugar
1/2 teaspoon cinnamon
1/4 teaspoon nutmeg
pinch of cloves
pinch of ginger
2 Tablespoons milk
1. In a large bowl, combine the flour, sugar, baking powder, salt, cinnamon, nutmeg, cloves, and ginger.
2. Cut the butter into the dry mixture, and combine until the mixture looks like wet sand. (You can also use your food processor for this step. I just used 2 knives, or you could also use a fork.)
3. In a small bowl, whisk together the pumpkin puree, heavy cream, and egg.
4. Add the wet ingredients to the dry ingredients and stir until a ball of dough is formed.
5. Place the dough on a floured surface and form a large dough circle, about 1 inch thick.
6. Use a pizza cutter to cut the dough into 8 equal wedges.
7. Place scones on a parchment paper lined cookie sheet and bake at 425 for 15 minutes, until light golden brown.
8. While the scones are cooling, mix together the powdered sugar, cinnamon, nutmeg, cloves, ginger, and milk to form the icing.
9. Drizzle the icing over the cooled scones and allow it to set before serving.
Source: It's Yummy to My Tummy
Labels:
Pumpkin,
Scones,
Secret Recipe Club
Friday, October 18, 2013
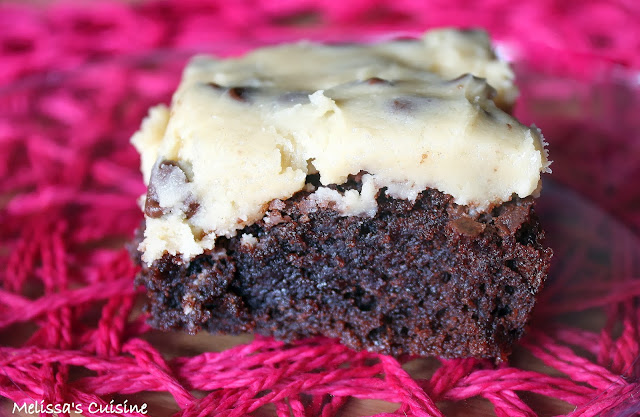
Cookie Dough Brownies {Flashback Friday}
It's time for Flashback Friday! In all honesty, I've struggled the past few weeks with balancing a new baby, going back to work, making recipes and updating my blog, and trying to have a life. In order to take a little stress off my plate, while still maintaining the posting schedule I strive for, I've decided to make Fridays Flashback Friday.
I have a lot of recipes on this blog. Since starting it over 5 years ago, I think the quality of my pictures and recipes has improved. (Don't get me wrong, there is still plenty of room for improvement, especially when I'm in a hurry!) On Fridays, I'll post an updated picture of one of my past recipes. I'll link to the old post, so you can get the recipe I originally posted. Hopefully that will give you a chance to see some of my old recipes, especially if you are a newer follower!
These Cookie Dough Brownies are one of my absolute favorite desserts! I could eat an entire bowl of cookie dough by myself, and probably a whole pan of brownies too! Yikes... I always under-bake the brownies slightly to leave them a little gooey. They're best that way! This recipe combines both in a delicious dessert.
Get the recipe here: Cookie Dough Brownies
Labels:
Brownies,
Chocolate,
Cookie Dough,
Desserts
Wednesday, October 16, 2013
Chili Dogs
I must admit, I am not a big fan of leftovers. Some foods are okay reheated, but most I tend to shy away from. Good thing Mike loves leftovers! He typically eats whatever we have for dinner one night for lunch the next day. I try to make recipes that make a good amount so that he has leftovers. Mike works a very physical job, and so by time lunch rolls around, he is ready for a filling meal, not just a sandwich or two.
One meal that I do enjoy as leftovers is chili. The longer the chili sits, the more the flavors meld together and the better it tastes! Another good thing about leftover chili is that it makes delicious chili dogs. I haven't always been a fan of hot dogs, but it's a meal that Mike often requests, and let's face it, they're easy to make!
Recently, I saw a clip on television about loaded hot dogs and I haven't been able to get them off my mind since then. We had some leftovers from the batch of chili that I made, so I decided that we'd have chili dogs. I drained off some of the liquid so we wouldn't have soggy buns, and topped the chili with some cheese. These chili dogs were everything I was hoping they would be!
Chili Dogs
Makes 8 chili dogs
Ingredients:
8 hot dogs, cooked
8 hot dog buns
2 cups chili, warmed
1/2 cup shredded cheddar cheese
1. Place each hot dog in a bun.
2. Top each hot dog with approximately 1/4 cup warmed chili. (I used a slotted spoon to scoop out the chili and drain off some of the liquid before topping the hot dog.)
3. Top the chili dogs with shredded cheddar cheese.
Monday, October 14, 2013
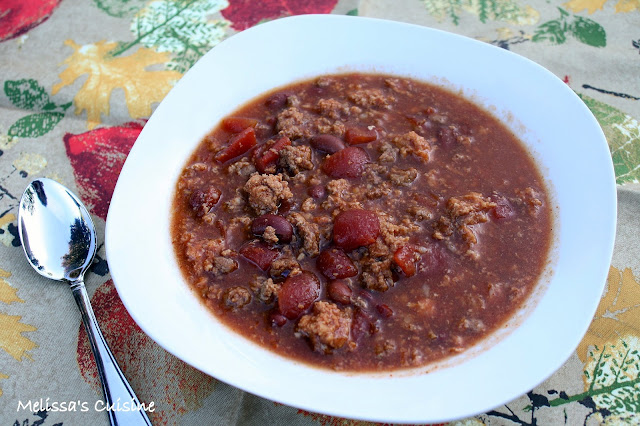
Chunky Chili
One of the great things about chili is that I've found it really doesn't matter what you put into it, the chances are it's going to taste great! My dad recently made a chili with spaghetti sauce in it. Surprisingly, it was pretty good! My go-to chili recipe calls for some unique ingredients like cocoa powder and beer. Since I didn't either of those ingredients in the house, I just combined the ingredients I did have and came up with this chunky chili. Mike and I both enjoyed it, and the leftovers were delicious the next day!
Chunky Chili
Serves 8
Ingredients:
2 pounds ground turkey
1 small onion, diced
1 Tablespoon minced garlic
2 14.5 ounce cans diced tomatoes
1 small can tomato paste
1 can red kidney beans (don't drain!)
32 oz beef broth
1 Tablespoon chili powder
1. Brown the ground turkey and drain the fat.
2. Add diced onion and minced garlic and cook until the onion is translucent.
3. Pour the diced tomatoes, tomato paste, kidney beans, and beef broth into your crock pot.
4. Add the meat mixture and chili powder and stir to combine.
5. Cook on low heat for 8 hours.
This recipe is entered in:

Wednesday, October 09, 2013
Ikea Playroom Giveaway
So...I've been a little absent from my blog lately. As you can imagine, I've been pretty busy. My goal of resuming my typical posting schedule has been replaced by posting as/when I have time. Every time I sit down to write out a blog post or edit pictures, I get distracted by something else or Summer wakes up. Oh well, priorities...
How about I make it up to you with a fantastic giveaway? I've teamed up with some other fantastic bloggers to offer you a $100 Ikea Giftcard giveaway! Who doesn't love Ikea?
Be sure to stop by Emily's blog to check out her Ikea Inspired Play Room and thank her for putting this giveaway together!
The giveaway runs from now until 10/12/13. It is open to US Residents only, be sure to read the Terms & Conditions (on the Rafflecopter form) for more information. This giveaway is sponsored by the bloggers below:
Melissa's Cuisine + Crumbs and Chaos + The Pink Flour
Yummy. Healthy. Easy + My Own Blog Review + Roubinek Reality
a Rafflecopter giveaway
Tuesday, October 08, 2013
Crock-pot Cheeseburger Soup
This past weekend, we had the opportunity to celebrate my Grandma's 80th birthday with our extended family. My mom's family lives in Canada, so we made the trip to visit everyone. It's about an 8 hour drive ...depending on how much of a lead foot your husband has and how long the baby wants to nurse for. The trip went really well, we stopped every couple hours to feed Summer and it worked well because I felt like our stops made the trip not feel like it was so long. Summer traveled well and only cried during the last 30 minutes of the trip when we were in stop & go traffic around Toronto.
My Grandma was so excited to meet her great-grand-daughter! She had balloons and a sign that read Welcome to my little sweetheart Summer Joy! Of course, as soon as we walked into the door she took Summer out of my arms. It took her a few minutes before she said hi to Mike and I. It was so precious to see Grandma's excitement over meeting Summer.
On Saturday, we had an open house and then a family dinner to celebrate. Grandma should have been the star of the show, but I think Summer was, and Grandma didn't mind a bit! Summer got passed around and met about a hundred people, she was mostly smiles the whole time! Mike and I had to come home on Sunday so we could go back to work today, but the celebration in Canada goes through today! They sure know how to party!
Over the weekend, the weather took a drastic change. It definitely feels like Fall is here to stay now! These Cheeseburger Soup is my new favorite fall food. It was so easy to make, I just put the ingredients into the Crock-pot before work one day. Then when Mike got home, he added the Velveeta cheese.
I used an entire bag of shredded potatoes, so I thought that it needed more liquid so I added extra chicken broth. I think that addition made the soup a little less thick than the original recipe. However, I really enjoyed the soup's texture this way. This recipe made about 8 servings, so Mike and I had plenty of soup for leftovers. It heated up well and we enjoyed a few more delicious lunches!
Crock-pot Cheeseburger Soup
Serves 8
Ingredients:
1 pound ground beef, cooked and drained
1 pound bacon, cooked and crumbled
2 pounds (1 bag) shredded hash browns
64 ounces (2 boxes) chicken broth
2 pounds (1 box) Velveeta cheese, cubed
1. Put ground beef, crumbled bacon, shredded hash browns, and chicken broth into your Crock-pot.
2. Cook on low for 6-8 hours.
3. About 30 minutes before serving, add cubed Velveeta cheese to the soup and stir. The cheese will melt on its own.
4. Cover the Crock-pot again and cook about 30 more minutes. Stir before serving.
Source: Well Cooked (original source site unavailable)
Subscribe to:
Posts (Atom)


