Melissa's Cuisine: March 2014

Monday, March 31, 2014

Dill Pickle Bread

This soft and moist white bread is made with pickle juice, giving it a unique and delicious flavor. It's perfect for sandwiches or eating plain!
Melissa's Cuisine:  Dill Pickle Bread
By now it should come as no surprise to you that I love pickles!  I've told you before that my mom buys Mike and I a huge jar of pickles for Christmas each year.  We both often slice up a pickle and enjoy it for a snack.  And, when I talk about these pickles, I don't mean those little spears.  Oh no, we go for the full pickle!

A couple weeks ago, Mike suggested that I make pickle bread.  No I've made all kinds of breads, and a variety of pickle recipes, but I've never thought to combine the two.  I did a little looking around online and it doesn't seem to be a very popular concept...yet!  

The water in your traditional bread recipe is replaced with dill pickle juice.  A small amount of dill weed is added to the dough.  This dough baked up into a beautiful loaf of bread.  When I cut into it, I couldn't believe how soft it was.  One bite and I was hooked!  

I used this bread as the base for a delicious sandwich (which I'll be sharing with you in the near future!)  We also enjoyed the bread on its own.  I was surprised when two and three days later, the bread was just as fresh tasting as the day I made it.

If you're a fan of pickles, you'll want to make this bread!
Melissa's Cuisine:  Dill Pickle Bread
Dill Pickle Bread

Makes 1 loaf

Ingredients:
1-1/4 cups dill pickle juice, warmed to 110 degrees
2 teaspoons yeast
2 Tablespoons sugar
1 egg
2 Tablespoons olive oil
1 teaspoon dill weed
3 cups flour

1.  In the bowl of your stand mixer, combine the warm pickle juice, yeast, and sugar.  Stir gently and allow it to sit for 5 minutes, until the yeast blooms.

2.  Add the egg and olive oil and mix.

3.  Mix in the dill weed and flour to form a dough.

4.  Knead on medium speed for 5 minutes.

5.  Cover the dough and let it rise until doubled, about 1 hour.

6.  Remove the dough from the bowl and shape it into a loaf.  Place in a greased 9x5" bread pan.

7.  Allow the dough to rise again until doubled, about 1 hour.

8.  Bake at 350 for 25-30 minutes, until golden brown.

Allow the bread to cool before removing from the pan and slicing.

Source:  Group Recipes

Friday, March 28, 2014

Avocados: Tips and Tricks

An avocado is a superfood, full of healthy fats, high in potassium, and incredibly versatile in its uses.
Melissa's Cuisine:  Avocados:  Tips and Tricks
Last summer I did a series of tips and tricks about various fruits.  Since I was recently introduced to avocados, I thought I would add a post about them!

I haven't always been a fan of avocados, but lately I have been purchasing them more often and incorporating them into our diet.  In fact, avocados were recommended as a first food for Summer.  Part of the reason for my post today is because I'll be talking about avocados in an upcoming Homemade Baby Food post and this will make a good reference!  Also, I have a delicious recipe coming up that uses avocado!

When choosing an avocado, you'll want to choose a fruit that is soft when pressed.  Side note here:  did you know avocados are actually fruit?  I always thought they were vegetables!  The flesh of an avocado turns brown when exposed to air (like bananas) and that can be prevented by serving it immediately or sprinkling it with lemon juice.  Avocados are typically served raw.
Melissa's Cuisine:  Avocados:  Tips and Tricks
Once you have selected a perfectly ripe avocado, you'll want to cut it in half lengthwise.
Melissa's Cuisine:  Avocados:  Tips and Tricks
You can discard the pit.  (I have heard you can plant it and grow your own avocado tree.  Has anyone ever tried it?)
Melissa's Cuisine:  Avocados:  Tips and Tricks
You can cut your avocado in a few different ways.  These are the two I do most often.  You can score the flesh of the avocado while in the skin.  Then flip the skin "inside out"  and the flesh will fall off.
Melissa's Cuisine:  Avocados:  Tips and Tricks
Alternatively, you can scoop the flesh of the avocado out of the skin with a large spoon.
Melissa's Cuisine:  Avocados:  Tips and Tricks
Place the avocado on a cutting board and slice as desired.  I typically dice mine so it is easier to mash.  If you're serving the avocado on a salad or burger, you could cut it into wedges.

Remember that avocados brown quickly, so you'll want to use the avocado shortly after you cut it.

Other Fruit Tips and Tricks:
Watermelon
Strawberries
Blueberries
Mangoes
Pineapple

Wednesday, March 26, 2014

Homemade Baby Food: The Basics

Have you considered making your own baby food?  It's simple, healthy, and budget friendly!  Not to mention fun!  This post focuses on the basic supplies you need to prepare your baby's food.
Melissa's Cuisine:  Homemade Baby Food: The Basics
So your baby is showing signs of being ready for solid foods.  Now what?  If you have thought
about making your own baby food, I'm here to help you!  Making baby food is quite simple, requires little to no special equipment, and takes very little time.  The health benefits of fresh food, along with the monetary savings are what convinced me to start making baby food for Summer.

Most pediatricians recommend breast milk or formula as the main source of nutrition for the first six months of your baby's life.  After that, they suggest starting your baby on cereals and fruits.

We started Summer on oatmeal cereal a little early because she refused a bottle and we thickened up her milk just enough for her to take it off a spoon.  Keep in mind that each child is different and it is best to consult your pediatrician before introducing new foods.  I started feeding Summer fruit just a couple weeks shy of six months.  Again, we started early due to her personal needs.  Also, most people recommend offering your child vegetables before fruits since once a baby tries fruit, they will often prefer the sweetness over the taste of vegetables.

Now that you've decided to make your own baby food, you'll need to gather a few supplies.  You will need a blender or food processor, microwave safe bowls (or steaming trays if you have them), and storage containers.  You can buy products specific for your needs, or use what you already have at home.

Here are the ones that I use:
Cuisinart BFP-703CH SmartPower Duet Blender and Food Processor, Chrome
KitchenAid Diamond Vortex 5 speed Blender- KSB1575ER
Vidalia Chop Wizard

Progressive International Microwavable Mini Steamer

Tovolo Perfect Cube Ice Trays


Fresh Baby So Easy Baby Food and Breast Milk Trays

OXO Tot Baby Blocks Freezer Storage Containers 2 Ounce, Set 6, Clear

OXO Tot Flip-Top Snack Cup, 2 Pack - Aqua/Pink

Making homemade baby food is fun for both the mom and the baby!  I love to try new food combinations and Summer loves to eat!  Now that you have all the necessary supplies, next week we'll talk about starting to make foods for your baby.

Do you make your own baby food?  Do you have an questions or recipes you would like me to share in upcoming posts?

This post contains affiliate links.

Homemade Baby Food Series
Vegetables
Fruits

Monday, March 24, 2014

Cheddar Chicken Pasta

This cheesy chicken pasta dish comes together quickly and is exploding with flavors of chicken, cheddar cheese, and mustard.  It's a delicious dinner dish!
Melissa's Cuisine: Cheddar Chicken Pasta
I love finding new blogs.  My blog list is constantly growing and I enjoy reading other peoples' posts.  The Secret Recipe Club is one of my favorite ways to discover new blogs.  This month I was assigned to Constance's blog, The Foodie Army Wife.  Constance is relatively new the the Secret Recipe Club, and I am thrilled to have been assigned to her blog this month.  I love Constance's Food-losphy which basically says that she cooks real food for her family who really loves family meal time.  She sounds a lot like me!  Besides the Army wife thing...

Anyway, I really enjoyed browsing through The Foodie Army Wife.  I finally narrowed my list of recipes to make down to 13.  Most of the recipes that enticed me were baked goods, like this Cinnamon Swirl Bread and these Nutella Swirl Muffins.  But I decided that I really wanted to make a main dish because our dinners have been seriously lacking lately.  These Cheddar Chicken Pasta fit the bill and so I decided to give it a whirl.

This meal came together quite quickly.  I had some chicken that was already cooked and cubed, so that helped speed things up.  While the pasta was cooking, I was able to make the sauce and then combine everything together.  I try not to make complicated meals on days that I work because that would cause us to eat too late at night.  I made this dish on my day off, but I certainly think I would have the time to make it after work too.

I really liked the flavor that the ground mustard and dijon mustard added to this pasta.  I'm not a fan of mustard typically, but I do enjoy its flavor in certain dishes.  The original recipe called for smoked cheddar cheese, but I only had mild cheddar in the house, so I used what I had.  Since this recipe uses an entire pound of pasta, you end up with quite a bit of food!  I chose to divide the leftovers into containers and froze them for a future dinner and lunch.  We enjoyed this pasta and I will certainly make it again!
Melissa's Cuisine: Cheddar Chicken Pasta

Cheddar Chicken Pasta

Serves 6

Ingredients:

1 pound mini penne pasta
1 teaspoon ground mustard
1 Tablespoon thyme
1 pound boneless skinless chicken breasts
1/2 teaspoon salt
1/2 teaspoon pepper
2 Tablespoons olive oil
1 small onion, finely diced
2 cloves garlic, minced
1/4 cup chicken broth
2 Tablespoons butter
2 Tablespoons flour
2 cups milk
1 Tablespoon dijon mustard
8 ounces sharp cheddar cheese, shredded
1 teaspoon oregano

1.  Cook pasta according to the directions on the box.  Drain and set aside.

2.  Combine ground mustard and thyme in a medium bowl.  (You'll add the chicken to it later, so make sure it's big enough.)

3.  Cut the chicken breasts into bite sized pieces.

4.  Pour olive oil into a skillet and cook the chicken over medium high heat until cooked through.

5.  Remove the chicken from skillet and toss it with the mustard and thyme.

6.  Add diced onion and garlic to the skillet.  Cook until they are tender.

7.  Add the chicken broth to the skillet and use it to deglaze the pan.

8.  Add the butter to the skillet.

9.  Whisk in the flour and cook for a minute.

10.  Whisk in the milk and dijon mustard and cook, stirring often, until the mixture begins to bubble and thickens.

11.  When the sauce has thickened, whisk in the shredded cheese and stir until it's melted.

12.  Stir in the oregano, chicken, and pasta.  Serve hot.

Source:  The Foodie Army Wife

Friday, March 21, 2014

Ranch Style Chicken {Flashback Friday}

Oops...I totally goofed last week!  I told you last Monday when I posted the Ciabatta Roll recipe that I'd be sharing a post on Friday showing what I made with them.  Then, I looked at the calendar and realized that Friday was Pi Day, and I needed to do a pie post.  Oh the life of a food blogger.

Anyway, I hope you'll forgive me.  One bite of these Ranch Style Chicken Sandwiches and I know you will!

The chicken in this recipe is marinated in a honey mustard sauce, giving it that perfect tang.  Then it's topped with a couple slices of crispy bacon and smothered with cheese.  The chicken is fabulous on its own, but the bacon and cheese put it over the top!
Get the recipe here:  Ranch Style Chicken Sandwich

Wednesday, March 19, 2014

Microwave Potato Chips

Did you know that you can make potato chips at home?  And there is no frying involved?  These microwave potato chips are easy, delicious, and could even be considered healthier!
Melissa's Cuisine:  Microwave Potato Chips
I have a huge sweet tooth, and Mike has a savory tooth.  Is there such a thing?  He loves chips, and could easily devour an entire bag in one sitting if I would let him!

He was totally shocked when he found out that I made potato chips at home!
Melissa's Cuisine:  Microwave Potato Chips
This chips are fun and easy to make!  They do take a bit of time, and don't produce a large amount of chips, so I wouldn't recommend making them for a party unless you have a lot of time on your hand.  However, if you are looking for a single serving snack or a fun after-school or movie night treat, these chips would be perfect!

You'll want to keep a close eye on the chips as you bake them.  The first five minutes of baking are pretty simple and you can walk away from the microwave.  However, when you get about halfway through the second five minutes, you'll want to stay where you can peek into the microwave.  The thickness of your potatoes will play the largest part in determining how long they take to crisp up. Some chips may crisp faster than others.  You'll also want to keep an eye on the browning of the chips, you certainly don't want them to burn!  After the second five minutes of baking, you'll want to remove any chips that are completely crisp before returning the plate to the microwave.

These chips really are fun to make, and you could add in some spices to flavor them however you want.  Dill weed, taco seasoning, garlic salt...the possibilities really could be endless!
Melissa's Cuisine:  Microwave Potato Chips
Microwave Potato Chips

Serves 1

Ingredients:
1 potato
baking spray
salt

1.  Wash and peel the potato.  Thinly slice it.

2.  Press the potato slices between two sheets of paper towel to absorb the excess moisture.

3.  Place potato slices in a single layer on a microwave safe plate.  Lightly spray with baking spray and sprinkle with salt.  (You can use olive oil if you have a spritzer.)

4.  Microwave potatoes for 5 minutes, then flip.

5.  Microwave an additional 5 minutes.

6.  Microwave remaining potatoes in 30 second increments until all the chips are crisp.  Remove chips from the plate as they become crisp and brown.

Note:  As all microwaves vary, you may need more or less time to reach the desired crispness for your chips.  Keep a close eye on your potatoes and remove the chips from the microwave as they become crisp.

These chips are best eaten the day they are made, but can be stored in an airtight container.

Monday, March 17, 2014

Bacon Cheddar Beer Bread

Bacon. Cheddar Cheese. Beer. Oh, and bread. Four ingredients to win the heart of any man, or woman!
Melissa's Cuisine:  Bacon Cheddar Beer Bread
This beer bread is definitely my favorite version I have made so far.  I took my basic beer bread recipe, which was already pretty amazing, and amped it up by adding in a generous amount of bacon and cheddar cheese.

Because bacon and cheese make everything better, am I right?

I served this bread with a generous bowl of chili, which coincidentally also has beer in it.  If you're a beer lover, you'll want to try this bread.  Actually, even if you're not, you'll want to try this bread.

I'm not a fan of beer, honestly, I can't stand the smell.  But there is just something about beer bread.  The alcohol and most of the beer flavor bakes out leaving you with a nutty and somewhat sweet bread.  Perfect for dipping in chili, slathering with butter, or (my favorite) as the best grilled cheese sandwich you'll ever have!
Melissa's Cuisine:  Bacon Cheddar Beer Bread
Bacon Cheddar Beer Bread

Makes one loaf, approximately 10 servings

Ingredients:

3 cups flour
1/3 cup sugar
1 tablespoon baking powder
1/2 teaspoon salt
1 (12-ounce) can beer
1 cup shredded cheddar cheese
8 slices bacon, cooked and crumbled
3 tablespoons butter, melted

1. Mix flour, sugar, baking powder and salt in a mixing bowl.

2. Add beer and mix until combined.

3.  Stir in cheese and bacon.

4. Place dough in a greased bread pan.

5. Pour melted butter over dough.

6. Bake at 350 for 55 minutes, until golden brown.

Allow the bread to cool before slicing.

Friday, March 14, 2014

Pie Day {Flashback Friday}

Happy Pi Day!  Or, as it's know among bloggers, pie day.  Today, of course, is 3/14 or 3.14, also know in the math realm as pi.  And today, we will celebrate with pie!
Melissa's Cuisine:  Pie Day {Flashback Friday}
Peach Pie
Melissa's Cuisine:  Pie Day {Flashback Friday}
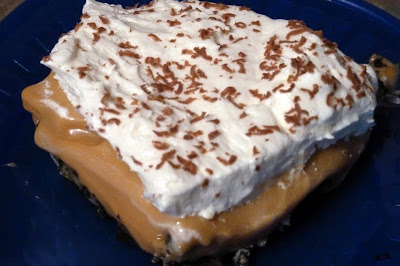
Dulce De Leche Pie
Melissa's Cuisine:  Pie Day {Flashback Friday}
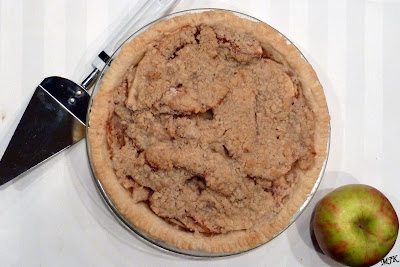
Apple Crumble Pie
Melissa's Cuisine:  Pie Day {Flashback Friday}
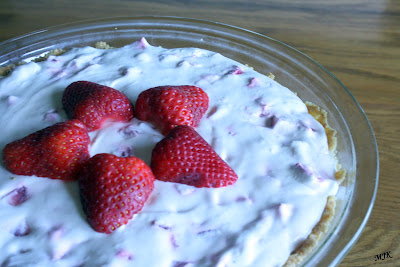
Strawberry Cream Pie
Melissa's Cuisine:  Pie Day {Flashback Friday}
Apple Snickers Pie
Melissa's Cuisine:  Pie Day {Flashback Friday}
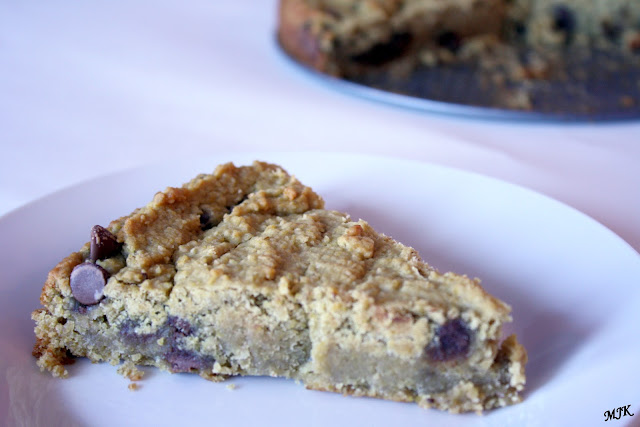
Deep Dish Cookie Pie
Melissa's Cuisine:  Pie Day {Flashback Friday}
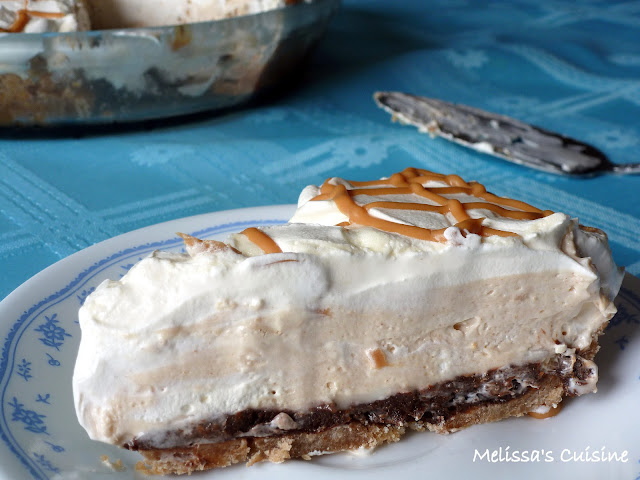
Triple Layer Peanut Butter Pie

Melissa's Cuisine:  Pie Day {Flashback Friday}
Blueberry Pie
Melissa's Cuisine:  Pie Day {Flashback Friday}
Rustic Apple Galette
Melissa's Cuisine:  Pie Day {Flashback Friday}
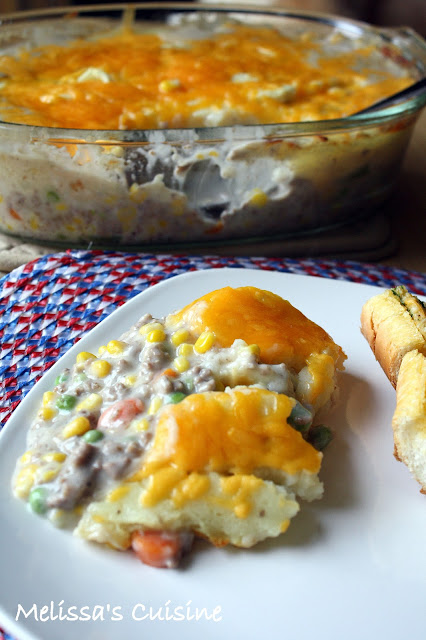
Shepherd's Pie
Enjoy!!!
01 10 11 12
Blogging tips