Melissa's Cuisine: July 2013

Monday, July 29, 2013

Been A Little Busy...

...in case you didn't notice, the blog was pretty quiet last week.

I have a really good reason for it.

I promise!


Summer Joy was born on Monday, July 22, at 11:59 am. She weighed in at 8 pounds and 2 ounces and was 19 inches long. She is doing well and I am head over heels in love with her!

As you can imagine, Summer is keeping me pretty busy right now. The blog might be pretty quiet again this week, but I have some fabulous guest posts starting next week!

Friday, July 19, 2013

Cinnamon Roll Coffee Cake

I've spent the last two weeks talking about fruit, so today, why don't we talk about something to go with all that fruit.  Something like a Cinnamon Roll Coffee Cake?  Sure sounds good to me!  After all, you can't just live on fruit alone--we need a little sugar, flour, and cinnamon in our lives!
The first time I made this coffee cake was when we stayed at my Aunt's house last Christmas.  I always bring along something that we can eat for breakfast on Saturday morning.  This Cinnamon Roll Coffee Cake was a hit with everyone, but I didn't get a chance to photograph it before it was devoured.  Oh well, that gave me a good excuse to make it again!
This cake is more than just your average coffee.  It has a crust.  And not just any crust either, this crust is made out of cinnamon rolls.  So not only do you get a delicious coffee cake, you also get a cinnamon roll in each bite.  Breakfast can't get much better!
Cinnamon Roll Coffee Cake

Serves 8-10

Ingredients:
1 (8 count) can cinnamon rolls, with frosting
3/4 cup sugar
1/4 cup vegetable oil
1 egg
1/2 cup milk
1 teaspoon vanilla
2 teaspoons baking powder
1/2 teaspoon salt
1-1/2 cups flour
1/2 cup brown sugar
2 teaspoons cinnamon
2 Tablespoons flour
2 Tablespoons butter, melted

1.  Open the can of cinnamon rolls and separate the rolls.

2.  One at a time, press the cinnamon rolls between your palms to flatten.

3.  Place flattened rolls on the bottom and sides of a greased 10" pie plate to form the crust.  Pinch any gaps together to seal the crust.

4.  In a large bowl, stir together the sugar, vegetable oil, egg, milk, and vanilla.

5.  Add the baking powder, salt, and 1-1/2 cups of flour and stir until no lumps remain.

6.  Pour the batter over the prepared crust.

7.  In a small bowl, combine the brown sugar, cinnamon, 2 Tablespoons flour, and melted butter.

8.  Sprinkle the topping over the coffee cake.

9.  Bake at 350 for 30 minutes, or until a toothpick inserted in the center of the cake comes out mostly clean. (Note: my cake took nearly 45 minutes to bake.  Be aware that ovens cook differently and keep an eye on your cake.)

10.  Allow the cake to cool slightly before drizzling with the icing that came with the cinnamon rolls.

Serve cake warm or at room temperature.  Cover leftovers with plastic wrap and store on the counter.

Source: Crazy for Crust

Wednesday, July 17, 2013

Pineapple: Tips and Tricks

I almost didn't included a pineapple in my Tips and Tricks series.  But then I saw one at the store the other day and decided it would be a great addition to the other fruits I've featured.  This is my last fruit post for a while, but please let me know if there are any other fruits you would like me to write about!

Melissa's Cuisine: Pineapple: Tips and Tricks
Have you ever had the chance to eat a pineapple in the country it was grown in?  Let me tell you, there's nothing like enjoying a fresh pineapple in Hawaii or Jamaica!  But, since I don't live on either of those islands, I have to settle for what I can buy at the grocery store.  My friend, who loves pineapple and eats it often when she is in Uganda, suggests letting your pineapple sit outside in the sun before cutting it.  That brings the natural juices out and you have a delicious snack.  If you prefer, you can also refrigerate the pineapple for a cold treat!

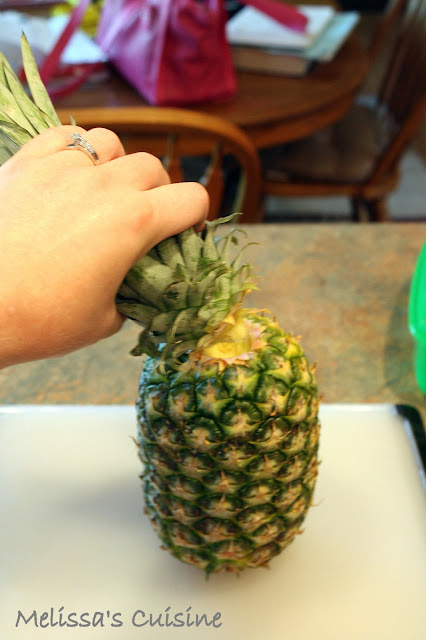
Place your pineapple on a cutting board. Carefully twist the green crown off from the fruit.

Melissa's Cuisine: Pineapple: Tips and Tricks

Melissa's Cuisine: Pineapple: Tips and Tricks
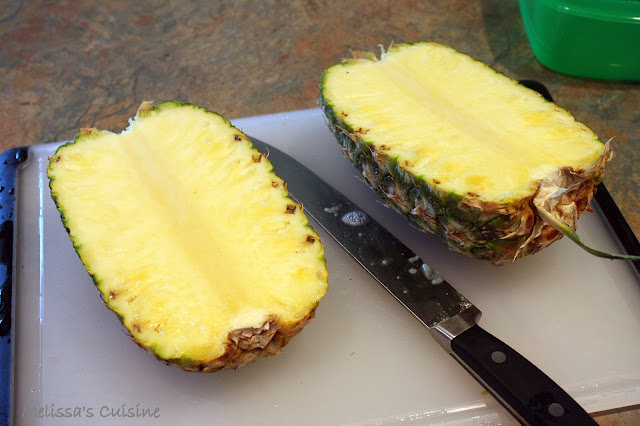
Using a large sharp knife slice the pineapple in half vertically.
Melissa's Cuisine: Pineapple: Tips and Tricks
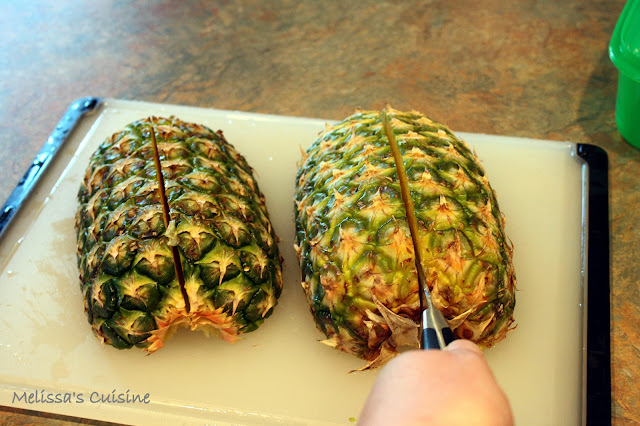
Place the two halves, cut side down, on your cutting board and cut them in half again.
Melissa's Cuisine: Pineapple: Tips and Tricks
Slice the hard core out of the center or each quarter of the pineapple.
Melissa's Cuisine: Pineapple: Tips and Tricks
Switch to a smaller paring knife if you'd like and slice the ends off of each piece of pineapple.

Melissa's Cuisine: Pineapple: Tips and Tricks
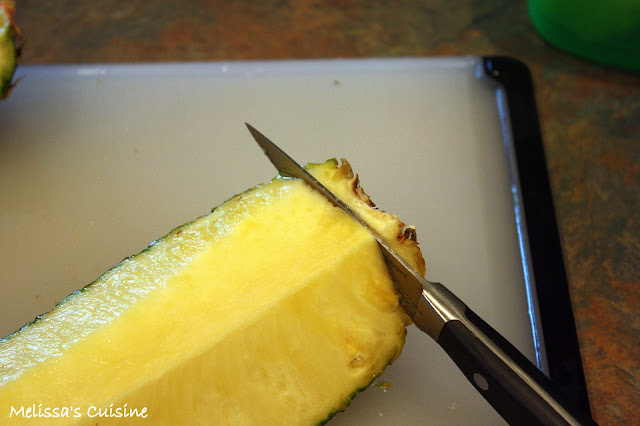
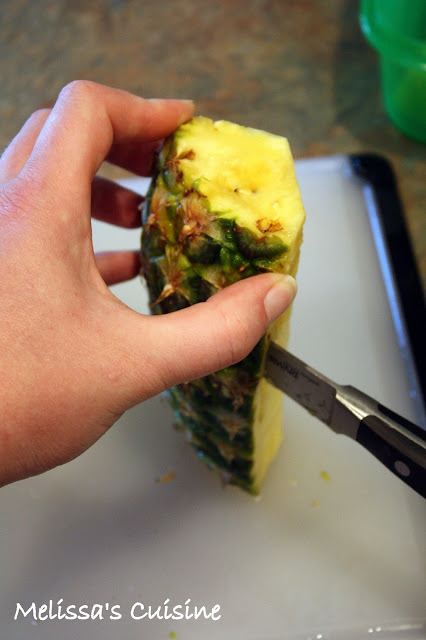
Holding the pineapple vertically, cut the pineapple between the fruit and the skin.  I cut through half the fruit and then turn the pineapple and cut the other half, rather than trying to cut the entire piece at once.  See how my knife is only cutting to about the halfway point? (I hope that description and the picture make sense!)
Melissa's Cuisine: Pineapple: Tips and Tricks
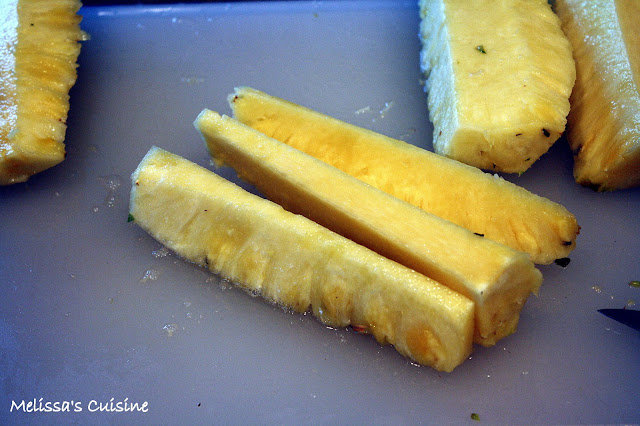
Cut the "peeled" pineapple into three long sections.
Melissa's Cuisine: Pineapple: Tips and Tricks
Cube the long sections into bite-sized pieces.
Melissa's Cuisine: Pineapple: Tips and Tricks
Place cut pineapple in an airtight container and store in the refrigerator.  Fruit can be served cold or at room temperature.
Melissa's Cuisine: Pineapple: Tips and Tricks
Other Fruit Tips and Tricks:
Watermelon
Strawberries
Blueberries
Mangoes
Avocados

Monday, July 15, 2013

Mangoes: Tips and Tricks

By now, it should come as no surprise to you that I love fruit.  I could eat it all day, every day, and not get tired of it.  In fact, there is only one fruit that I've ever had and didn't care for.  Starfruit.  I found that it didn't have any taste and was like eating a watery pineapple.  I'll pass...thanks!  Have you ever had starfruit and did you like it?

Mangoes are another one of my favorite fruits.  They happen to be one of my grandma's as well.  When I was younger, my brother and I would spend a week with my grandparents every summer.  Grandma always made sure that she had mangoes in the house for us to enjoy together!

Melissa's Cuisine: Mangoes: Tips and Tricks

When I was in high school, one of my friend's families had an exchange student from Mexico staying with them.  He became friends with my brother and at one point he taught us the proper way to cut a mango. Prior to learning this method, I would peel the mango (like peeling an apple) and then slice off pieces of the flesh.  I usually ended up with a sticky mess, and this way is so much easier!

When you are purchasing a mango, you want to look for a fruit that is firm, but gives slightly when you press on it.  Color is not an indicator of ripeness. Mangoes continue to ripen as they sit, so you'll want to eat it before it becomes completely soft.

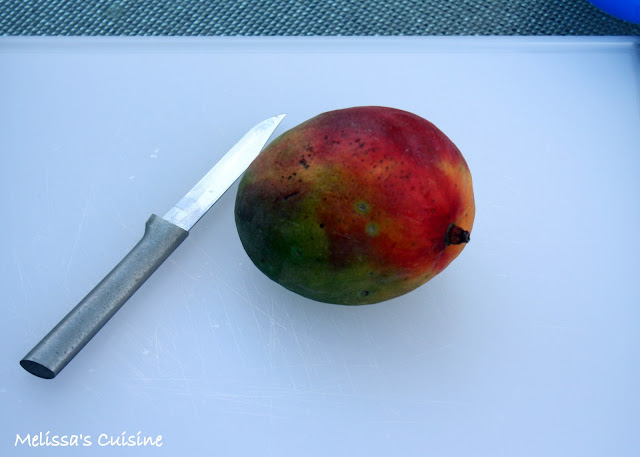
To start, you'll need a cutting board and a sharp knife.
Melissa's Cuisine: Mangoes: Tips and Tricks
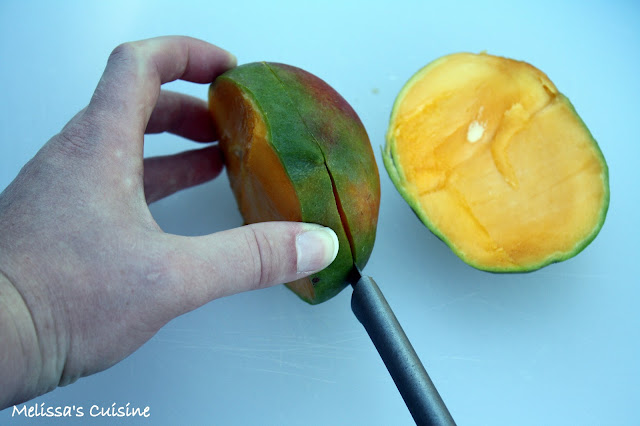
Hold the mango vertically and slice along the pit, right next to the stem.
Melissa's Cuisine: Mangoes: Tips and Tricks

Melissa's Cuisine: Mangoes: Tips and Tricks
Turn the mango around and slice next to the pit on the other side.
Melissa's Cuisine: Mangoes: Tips and Tricks
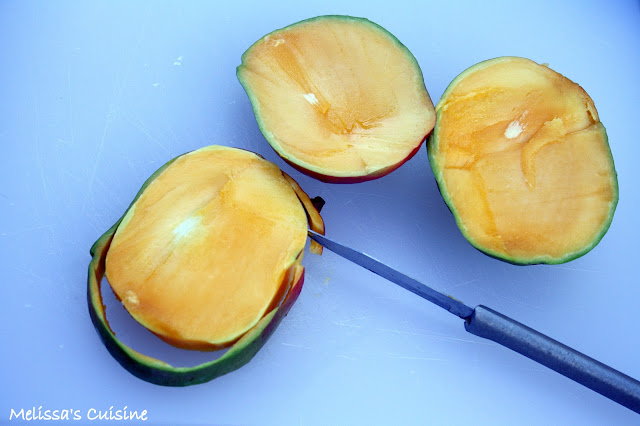
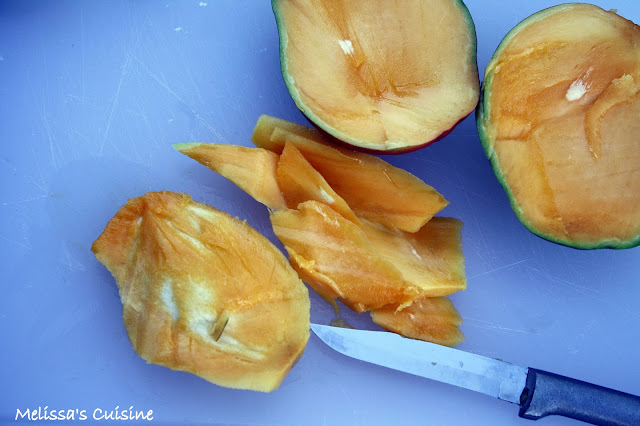
Cut the peel off around the pit and carefully slice off and flesh from the pit.  Don't worry about making nice slices!
Melissa's Cuisine: Mangoes: Tips and Tricks

Melissa's Cuisine: Mangoes: Tips and Tricks
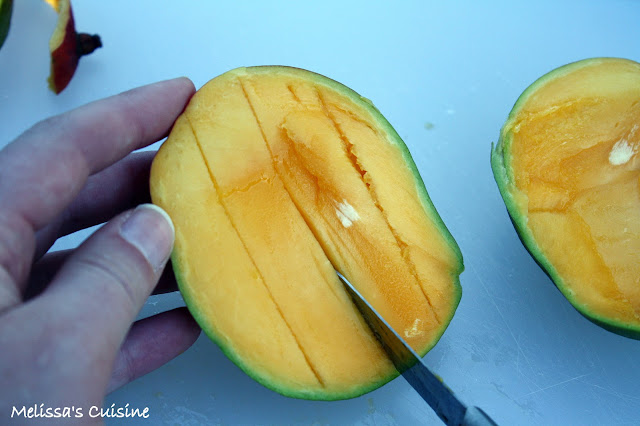
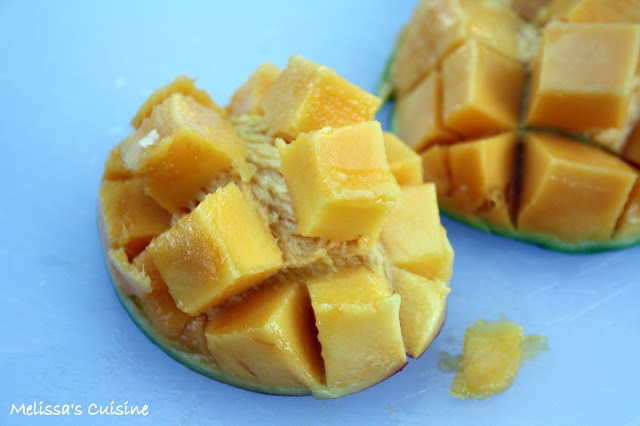
Slice vertical lines in each mango half, being careful not to slice all the way through the peel.
Melissa's Cuisine: Mangoes: Tips and Tricks
Then cut horizontal lines creating a "grid" in the mango flesh.
Melissa's Cuisine: Mangoes: Tips and Tricks
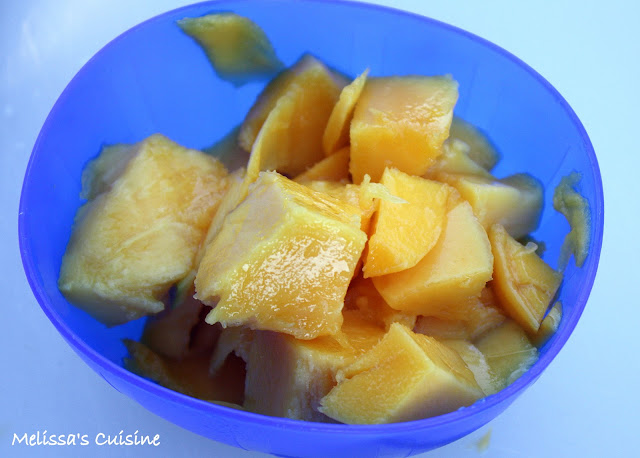
Turn the fruit inside-out and slice off the fruit chunks.
Melissa's Cuisine: Mangoes: Tips and Tricks
Enjoy a bowl of freshly cut fruit!  Ripe mangoes can also be stored in the fridge for up to a week before cutting.  Cut mango should be refrigerated in an airtight container and eaten within 2 or 3 day of cutting.
Melissa's Cuisine: Mangoes: Tips and Tricks

Other Fruit Tips and Tricks:
Watermelon
Strawberries
Blueberries
Pineapple
Avocados

Friday, July 12, 2013

Blueberries: Tips and Tricks

Let's continue talking about fruit!  I simply can't get enough of blueberries this year!  Our local grocery store has had blueberries on sale for the past few weeks.  Every time I go, I have to pick up 2 or 3 containers.  Lucky for me, Mike doesn't like blueberries, so I get to enjoy them all myself!

As with strawberries, I grew up going blueberry picking with my mom every summer.  We found a place not too far from our house where the blueberry bushes weren't tended to but the prices were half of the other berry farms!  I've gone blueberry picking on my own for the past couple years.  I like to pick an abundance of berries so I can enjoy some fresh and also freeze some.  I use the same method to freeze my blueberries as I do for my strawberries (sometimes I rinse the blueberries before freezing, other times I give them a quick rinse to help them thaw.)

Here's how I store my fresh blueberries:

You can use store-bought blueberries, fresh picked blueberries, or berries from the farmer's market!  Oh, I can't wait until our farmer's market has big plump berries!
Melissa's Cuisine: Blueberries: Tips and Tricks
Pour the blueberries into an airtight container.  Again, if you have a chance to buy the green produce container, I'd definitely recommend it!
Melissa's Cuisine: Blueberries: Tips and Tricks
When you're ready to use the berries, rinse them with water, either by the handful or in a colander.  I choose to wash my berries just before using them because I've found that allowing blueberries to soak in water makes them water logged.
Melissa's Cuisine: Blueberries: Tips and Tricks
Have you ever gone blueberry picking?

Other Fruit Tips and Tricks:
Watermelon
Strawberries
Mangoes
Pineapple
Avocados

Wednesday, July 10, 2013

Strawberries: Tips and Tricks

Nearly every year for as long as I can remember, I have picked strawberries.  Growing up, I remember going with my mom (and sometimes my grandparents) and spending a couple hours in the blazing sun and heat picking berries.  I have to admit, I probably did my fair share of complaining!  However, being able to enjoy strawberries for the rest of the year made the heat and sweat worth-while.
Melissa's Cuisine:  Strawberries--Tips and Tricks

Since we've been married, I have been able to convince Mike to go strawberry picking with me.  Usually it comes with some stipulations, like that we only go for an hour and that he gets to play video games later in the day.  I can deal with that, and we both enjoy having strawberries in the freezer for year round strawberry smoothies!  This year was the first year in a long time that I haven't picked my own strawberries.  Something about squatting and picking berries in the heat while 8 months pregnant just doesn't sound so great to me.  I ended up buying a bunch of strawberries instead, but didn't buy enough to freeze this year, because they haven't been cheap enough!  What can I say?  I'm Dutch!

Here's the process I use to wash and store (and freeze) my strawberries:

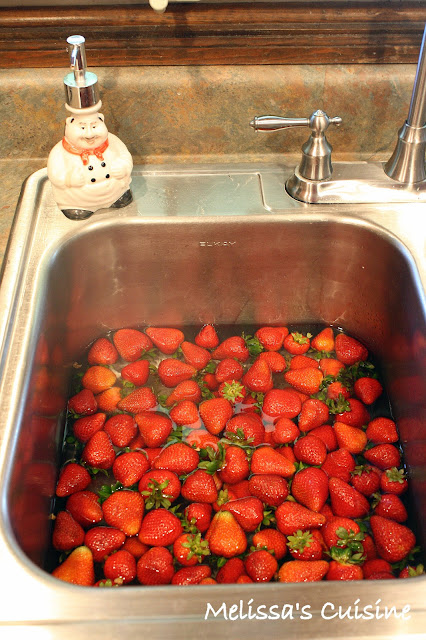
Wash strawberries in a mix of water and vinegar.  I usually fill my sink about 1/3 of the way full and pour in approximately 1 cup of vinegar.  Allow the berries to soak for 5 minutes. 
Melissa's Cuisine:  Strawberries--Tips and Tricks
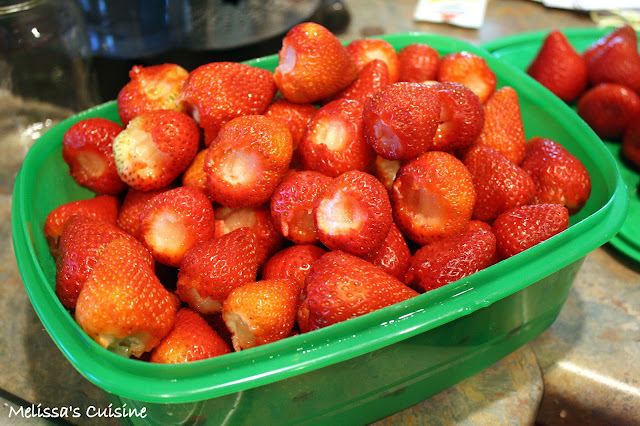
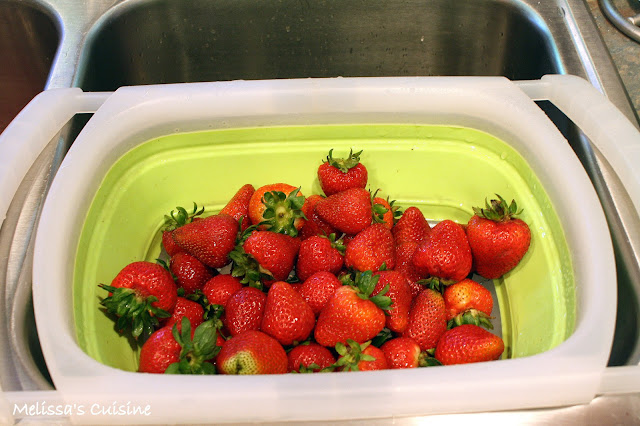
Remove the berries from the vinegar water and rinse them with fresh water.  Remove the greens from the strawberries.  I find it easiest to just pull them off using my thumbnail, but you can also use a knife or a grapefruit spoon.
Melissa's Cuisine:  Strawberries--Tips and Tricks
Place washed strawberries in an airtight container.  If you ever have a chance to purchase these green containers (for produce), I would recommend it as I really think they help extend the life of my fruits and vegetables!
Melissa's Cuisine:  Strawberries--Tips and Tricks
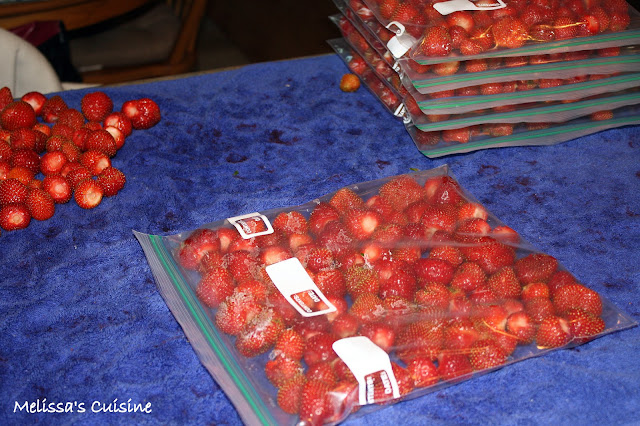
If you would like to freeze your berries, after removing the greens, place them on a towel to air dry.  If you want to speed up the process, you can use a fan to dry the strawberries.  (I took these pictures last year after Mike and I picked strawberries.)
Melissa's Cuisine:  Strawberries--Tips and Tricks
When the strawberries have completely dried, place them in a single layer in a freezer bag.  Press out as much air as possible and seal the bag.
Melissa's Cuisine:  Strawberries--Tips and Tricks
Keeping the bags flat, place them in the freezer to store. 
Melissa's Cuisine:  Strawberries--Tips and Tricks
Enjoy "fresh" strawberries year round!

Other Fruit Tips and Tricks:
Watermelon
Blueberries
Mangoes
Pineapple
Avocados

Monday, July 08, 2013

Watermelon: Tips and Tricks

One of my favorite things about summer is the abundance of fresh fruits.  I love eating fruit year round, but it's even better to enjoy fruits that are in season.  I eat a big bowl of fruit every morning with my breakfast; it's a delicious, filling, and healthy way to start my day.

This week I'll be sharing some posts about fruit.  I have discovered some tricks to keeping fruit fresh longer, as well as some tips for cutting certain fruits.  If you love fruit as much as I do, I hope you'll find these tips and tricks helpful.

Watermelon: Tips and Tricks


First up is watermelon.  I think I can credit my uncle for my love of watermelon!  I remember visiting him in Kentucky and sitting by his pool eating an enormous slice of watermelon.  I'm not exaggerating either--he cut a watermelon into quarters and my brother and I each had a quarter.  It was delicious!

I grew up cutting watermelon into slices, cutting through the rind, and ending up with some very uneven pieces.  I don't remember where I learned this trick for cutting up a watermelon, but it has become my go-to method.  This way results in a minimal amount of wasted flesh, as well as fairly even chunks.  I would recommend using this method for cutting if you are planning to use the watermelon in a fruit salad or planning to store cut up melon in the fridge.

When you purchase your watermelon, you'll want to look for a fruit that is dull green.  Look for a white-yellow circle on the bottom, this indicates that the melon was left in one spot to ripen, and that's a good thing.    Give the watermelon a slap; if it sounds hollow, you have a good melon!

I cut up this watermelon for our 4th of July lunch.  Special thanks to Mike and my mom for taking pictures of the process for me!

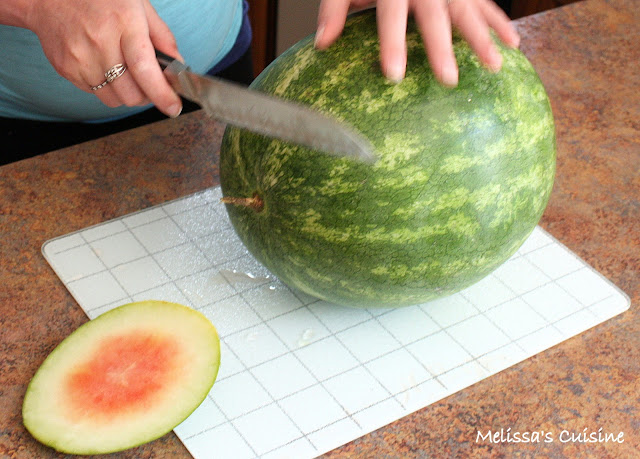
To begin, place your watermelon on a clean cutting board.  You'll need a good sharp knife.
Melissa's Cuisine:  Watermelon: Tips and Tricks
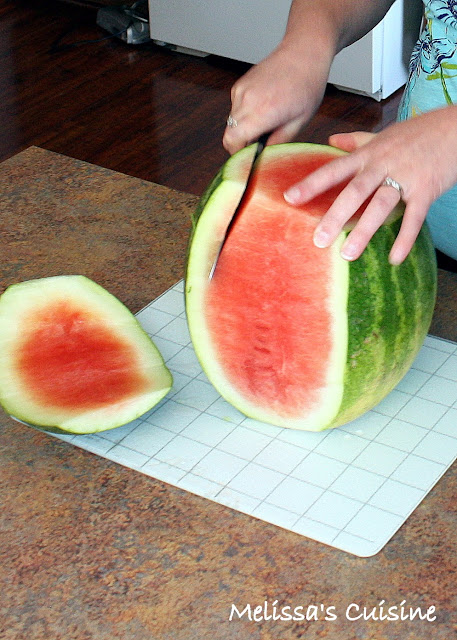
Slice off both ends of the watermelon.
Melissa's Cuisine:  Watermelon: Tips and Tricks
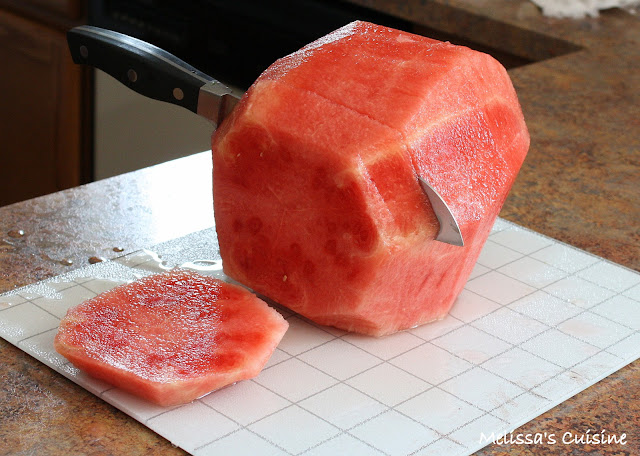
Stand the melon up on one of the sliced ends.  Following the curves of the watermelon, slice the rind off vertically.
Melissa's Cuisine:  Watermelon: Tips and Tricks
Continue to slice off the rind until the whole fruit is bare.  If necessary, slice off any white pieces you may have missed.
Melissa's Cuisine:  Watermelon: Tips and Tricks
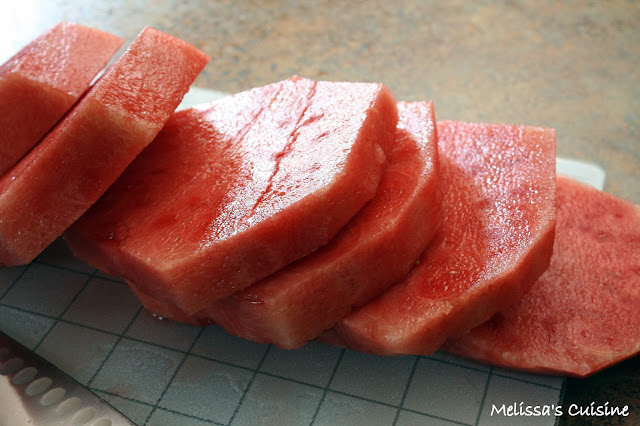
When the flesh is completely exposed, lay the watermelon on one side and slice into rounds.
Melissa's Cuisine:  Watermelon: Tips and Tricks

Melissa's Cuisine:  Watermelon: Tips and Tricks

Melissa's Cuisine:  Watermelon: Tips and Tricks
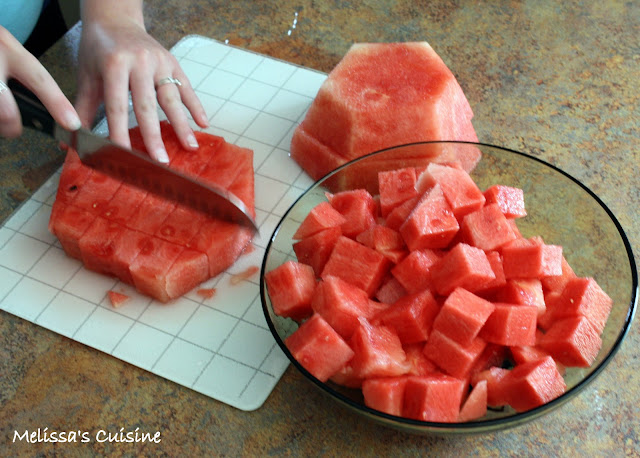
Slice each watermelon round into chunks.
Melissa's Cuisine:  Watermelon: Tips and Tricks

Melissa's Cuisine:  Watermelon: Tips and Tricks
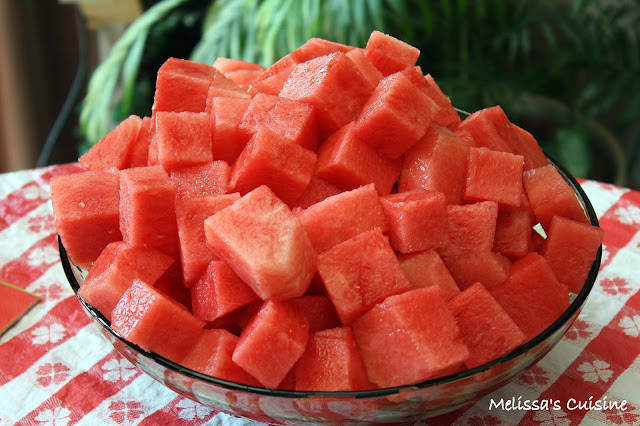
Place chunks in a bowl and enjoy!
Melissa's Cuisine:  Watermelon: Tips and Tricks
Cut watermelon can be served immediately, or stored in an airtight container in the fridge until you're ready to serve.  I find that when properly stored, cut watermelon lasts about 1 week in the fridge (though it's rare that it lasts that long in my house!)

Other Fruit Tips and Tricks:
Strawberries
Blueberries
Mangoes

Wednesday, July 03, 2013

Peach Lemonade

Melissa's Cuisine: Peach Lemonade (just 2 ingredients!)
I am so excited!  Do you know why?  It's because I have a four day weekend, starting tomorrow!  But that's not the only reason I'm excited.  The best part is, Mike also has a four day weekend!  His work has been so busy for the past 6 months that it's rare he has more than just Sunday off.  So both of us having four consecutive days off together is something to celebrate!

We plan to spend Thursday in my hometown celebrating the 4th of July.  Then Friday, we've declared a "relax" day.  There are a few movies out that we want to see, so we'll probably hit up a movie and then spend the rest of our day doing whatever sounds fun.  Saturday, I have a baby shower (so excited!) and then Sunday we'll stick with our typical routine of church and dinner with my parents.  I'm so looking forward to spending some much needed quality time with my husband!

We've both been hit with the realization that our time together as a family of 2 is limited.  At my doctor appointment earlier this week, the doctor said our baby is ready to come, so now it's just a matter of time.  Mike and I plan to enjoy every minute together in these last few weeks or days before our baby arrives.

That being said, I hope that you'll understand when I don't post a new recipe this Friday.  I'll be spending the day with Mike!  And who knows, I might be able to spend a few minutes in the kitchen working on some new recipes.  I'm trying to stock pile some posts for when the baby is here and I'm too tired to think about blogging.  If you're interested in submitting a guest post to help me out during that time, I'd love to hear from you, just shoot me an email!

Now, on to this Peach Lemonade recipe.  I've loved peach nectar ever since my first trip to Romania, almost 8 years ago now.  On the plane we were served peach nectar and it was so unbelievably delicious!  Since then, any time I see peach nectar as an option at a restaurant (very rare in the states) or on the shelf at the store, I have to have it!  It's so sweet and tastes like you're biting into a juicy peach, minus the juice running down your chin.  When I saw a recipe combining lemonade and peach nectar, I knew it would be a winner.  I served this drink with dinner when we had our small group over a couple weeks ago.  It was a hit with everyone who tried it.  I know this will be another summer drink staple in our house!
Melissa's Cuisine: Peach Lemonade (just 2 ingredients!)
Peach Lemonade

Serves 6-8

Ingredients:
1 quart lemonade
1 cup peach nectar

Combine the lemonade and peach nectar.  Chill before serving.

Source: Shaken Together

Here's another delicious lemonade recipe that would be great for your 4th of July celebration:
Sparkling Strawberry Lemonade

01 10 11 12
Blogging tips