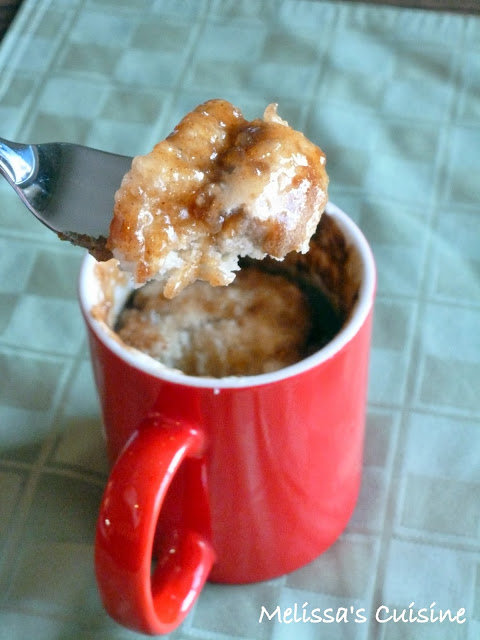
This Single Serving Coffee Cake satisfies your desire for a sweet breakfast without the need to make an entire cake!
Are you a black Friday shopper? I have to admit, I love shopping on the day after Thanksgiving! While I wouldn't say I'm one of the die-hard bargain shoppers, I do enjoy getting out with all the other "crazies" to snag a good deal! Mike and I have been known to get up at 3am to be in line at a store by 4. Usually we spend an hour or two freezing our rears off while waiting for the stores to open. I just love the atmosphere--everyone out shopping and having a good time!
Honestly, we just go for the fun of it. Most years, we don't have much on our lists and certainly not anything we'd be really upset over not getting. Last year, I think we stood in line for an hour just to get a deal on some enormous rawhide bones for Champ! This year, I'll be enjoying black Friday from the comfort of my home, while snuggling with my baby girl. Mike might go out for one or two things, and we might hit up a couple stores later in the morning, but there's no way I'm taking Summer out in the early morning craziness!
If you're a black Friday shopper, regardless of how intense you are, you'll need to have a delicious breakfast to give you energy for the morning. This Single Serve Coffee Cake is made in a mug and is the perfect quick breakfast! It is perfect for when you're wanting a warm and delicious breakfast, but don't want an entire cake in the house. It's also great for portion control; if I had the whole cake in the house I would eat it by myself, with this single serve cake, I avoid that issue!
Single Serve Coffee Cake (In a Mug)
Serves 1
Ingredients:
1-1/2 Tablespoons sugar
2-1/2 Tablespoons flour
pinch of salt
1/4 teaspoon baking powder
1 Tablespoon vegetable oil
1 Tablespoon milk
splash of vanilla
1 Tablespoon brown sugar
1/4 teaspoon cinnamon
1 Tablespoon powdered sugar
1/2 teaspoon milk
1. In a small bowl, combine the sugar, flour, salt and baking powder.
2. Add oil, milk, and vanilla and stir until combined.
3. Pour into a coffee mug that has been sprayed with cooking spray.
4. Sprinkle brown sugar and cinnamon on top.
5. Microwave for 45 seconds, until the center of the cake bounces back when touched (or is no longer runny). Note: microwaves cook differently, so yours might take more or less time to cook.
6. Mix the powdered sugar and milk to form a thin icing. Drizzle over the cake and serve warm.
Source: Crazy For Crust
Wednesday, November 27, 2013
Monday, November 25, 2013
Peanut Butter and Chocolate Cinnamon Rolls
This sweet roll is filled with peanut butter and chocolate chips. A delicious way to start your morning!
Holidays tend to revolve around food at my house! We typically sleep in and then eat a leisurely breakfast. Then we move on to our morning activities: watching the parade on Thanksgiving or opening gifts on Christmas. We'll often munch on some appetizers before having a late lunch. Dinner is often leftovers from lunch or some more appetizers or even another slice of dessert!
One of my favorite breakfast foods is cinnamon rolls. This isn't your traditional cinnamon roll though! Oh no, this one is stuffed with peanut butter and chocolate chips! I've made other stuffed cinnamon rolls before, like cookie dough, funfetti, and peach. This peanut butter and chocolate chip roll definitely ranks up there as one of my favorites!
P.S. There is not any cinnamon in the roll, so the title is a bit misleading, but regardless of the filling, I still call these cinnamon rolls! :)
Peanut Butter Cinnamon Rolls
Makes 9 rolls
Ingredients:
3/4 cup milk
2-1/4 teaspoons yeast
1/3 cup sugar
3 Tablespoons butter, softened
1/2 teaspoon salt
1 egg
3 cups flour
2/3 cup peanut butter
1 cup brown sugar
1 cup chocolate chips
1. Measure milk into a glass measuring cup and microwave for about 30 seconds, until the milk is about 120 degrees.
2. Add the yeast and sugar to the milk and allow it to sit for 5 minutes, until the mixture becomes frothy.
3. In the bowl of your stand mixer using the paddle attachment, combine the butter, salt, and egg.
4. Add the milk mixture and stir.
5. Switch to the dough hook and add the flour to the mixing bowl. Mix on low speed until the dough forms a ball.
6. Cover the bowl with plastic wrap and set it in a warm place to rise until doubled in size, about 1-1/2 hours.
7. While the dough is rising, stir together the peanut butter and brown sugar.
8. Once the dough has risen, turn it out onto a floured surface. Roll it into a rectangle, about 12" by 9".
9. Spread the peanut butter mixture over the dough. It might be a little difficult to spread, just do the best you can!
10. Sprinkle the chocolate chips over the peanut butter mixture.
11. Roll the dough up tightly from the long end. Slice into 9 equal slices. I find it's easiest to use dental floss to cut the dough!
12. Place the cinnamon rolls in a greased 9" pan.
13. Allow the rolls to rise for 1 hour, until the rolls are expanded in the pan.**
14. Bake at 350 for 20-25 minutes, until golden brown.
**If desired, you can stop at this point and refrigerate the rolls overnight. Cover tightly with plastic wrap and place in the fridge. When you're ready to bake them, allow the rolls to come to room temperature while the oven is preheating. Then bake at 350 for 25-30 minutes, until golden brown.
Source: Crazy for Crust
Labels:
Breakfasts,
Chocolate,
Cinnamon Rolls,
Peanut Butter
Wednesday, November 20, 2013
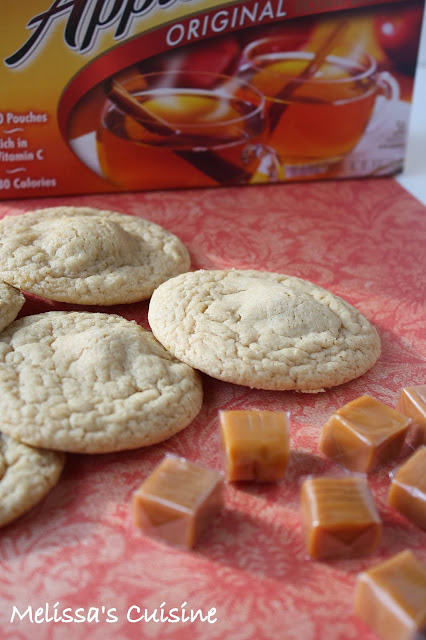
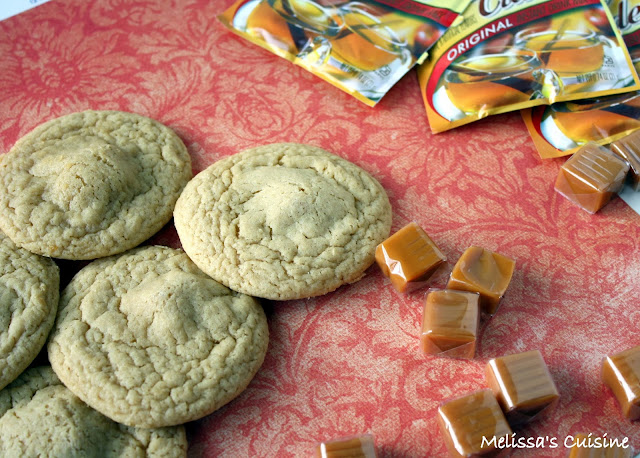
Caramel Apple Cider Cookies
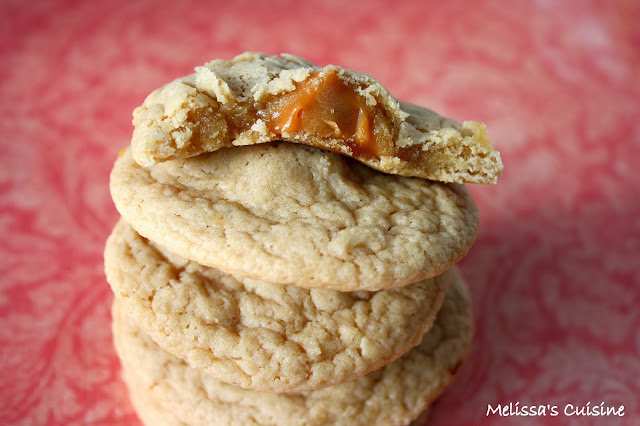
Apple cider cookies stuffed with caramel, does it get much better?
This fall, I just can't get enough apple cider! I pick up a gallon every week when I get groceries. I love hot cider, so I'll typically heat up a mug and take it to work with me each morning. There's no better way to start my day out than sipping some hot cider while checking my work emails.
When I saw this recipe a couple weeks ago, I knew I had to find the time to make it. I mean, seriously, what could be better than cookies that taste like apple cider? As I quickly found out, the answer is very few things. These cookies are incredible! I couldn't believe how much flavor they had!
I always keep a box (or two) of the Alpine Spiced Cider Apple Flavor Drink Mix packets in the house, just in case I run out of fresh cider or have a craving during off season. I was happy to be able to put a box of the packets to good use in these cookies.
I loved the chewy caramel hidden in the center of these cookies. In the days after making the cookies, I found that if I popped a cookie in the microwave for about 5 seconds, the caramel became perfectly gooey.
All this talk about cider...I'm off to pour a glass!
Caramel Apple Cider Cookies
Makes about 3 dozen cookies
Ingredients:
1 cup butter, softened
1 cup sugar
1/2 teaspoon salt
1 box (10 packets) Alpine Spiced Cider Apple Flavor Drink Mix
2 eggs
1 teaspoon vanilla
1 teaspoon baking soda
1/2 teaspoon baking powder
3 cups flour
1 bag caramels, unwrapped
1. Cream together the butter, sugar, salt, and apple cider packets until light and fluffy.
2. Beat in the eggs and vanilla.
3. Add in the baking soda, baking powder, and flour and mix until combined.
4. Scoop golf ball sized chunks of dough and flatten slightly in your hand. Place a caramel in the center** and work the dough around the caramel, shaping into a ball.
5. Place cookie dough onto a greased or parchment paper lined cookie sheet, about 2 inches apart.
6. Bake 12-14 minutes, until golden brown.
7. Allow the cookies to cool slightly before removing from the cookie sheet and cooling on a cooling rack.
**If you want to have the caramel spread through the cookie rather than just in the center, you can flatten the caramel with the back of a spoon or a rolling pin before placing in the cookie dough. I tried, but my caramels were too hard!
Source: Mom's Test Kitchen
This post contains affiliate links.
This fall, I just can't get enough apple cider! I pick up a gallon every week when I get groceries. I love hot cider, so I'll typically heat up a mug and take it to work with me each morning. There's no better way to start my day out than sipping some hot cider while checking my work emails.
When I saw this recipe a couple weeks ago, I knew I had to find the time to make it. I mean, seriously, what could be better than cookies that taste like apple cider? As I quickly found out, the answer is very few things. These cookies are incredible! I couldn't believe how much flavor they had!
I always keep a box (or two) of the Alpine Spiced Cider Apple Flavor Drink Mix
I loved the chewy caramel hidden in the center of these cookies. In the days after making the cookies, I found that if I popped a cookie in the microwave for about 5 seconds, the caramel became perfectly gooey.
All this talk about cider...I'm off to pour a glass!
Caramel Apple Cider Cookies
Makes about 3 dozen cookies
Ingredients:
1 cup butter, softened
1 cup sugar
1/2 teaspoon salt
1 box (10 packets) Alpine Spiced Cider Apple Flavor Drink Mix
2 eggs
1 teaspoon vanilla
1 teaspoon baking soda
1/2 teaspoon baking powder
3 cups flour
1 bag caramels, unwrapped
1. Cream together the butter, sugar, salt, and apple cider packets until light and fluffy.
2. Beat in the eggs and vanilla.
3. Add in the baking soda, baking powder, and flour and mix until combined.
4. Scoop golf ball sized chunks of dough and flatten slightly in your hand. Place a caramel in the center** and work the dough around the caramel, shaping into a ball.
5. Place cookie dough onto a greased or parchment paper lined cookie sheet, about 2 inches apart.
6. Bake 12-14 minutes, until golden brown.
7. Allow the cookies to cool slightly before removing from the cookie sheet and cooling on a cooling rack.
**If you want to have the caramel spread through the cookie rather than just in the center, you can flatten the caramel with the back of a spoon or a rolling pin before placing in the cookie dough. I tried, but my caramels were too hard!
Source: Mom's Test Kitchen
This post contains affiliate links.
Labels:
Apple,
Caramel,
Cookies,
Sugar cookies
Monday, November 18, 2013
Gingerbread Spread
This delicious Gingerbread Spread tastes like Christmas!
I love holiday flavors. You know the ones I mean: pumpkin, apple, peppermint, gingerbread. Oh gingerbread, the quintessential flavor of Christmas!
Who hasn't decorated a gingerbread bread house or devoured a plate full of gingerbread boy cookies? This time of the year, gingerbread is so popular!
I wanted to stick with my flavors of the season theme for this month's Secret Recipe Club. The past two months I made something apple and pumpkin.
I was assigned Chris' blog, Mele Cotte. Did you know Mele Cotte means baked apple in Italian? I love baked apples, so I knew I would love Chris' blog. I had plenty of options to choose from as her recipe catalog is quite impressive! After narrowing down my list, I settled on making Gingerbread Spread.
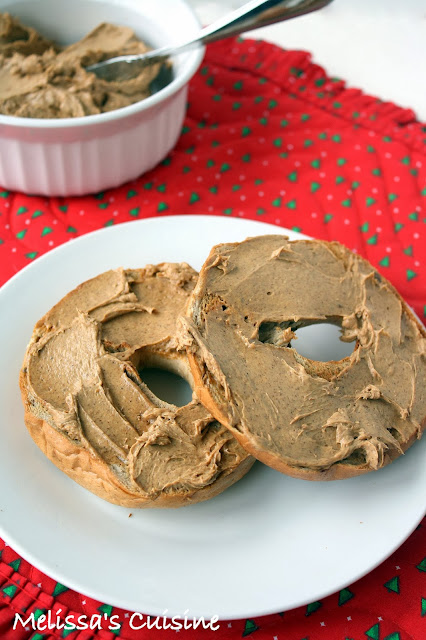
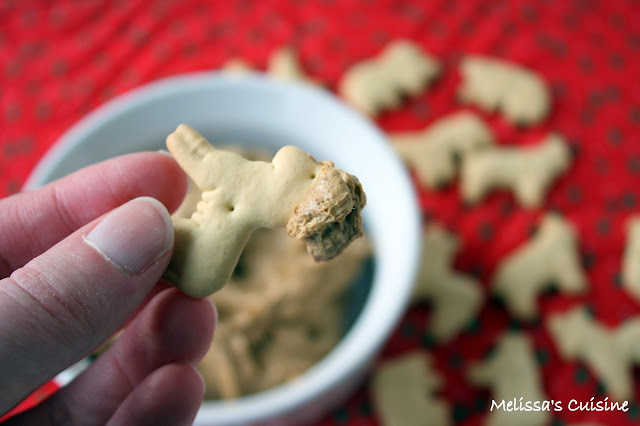
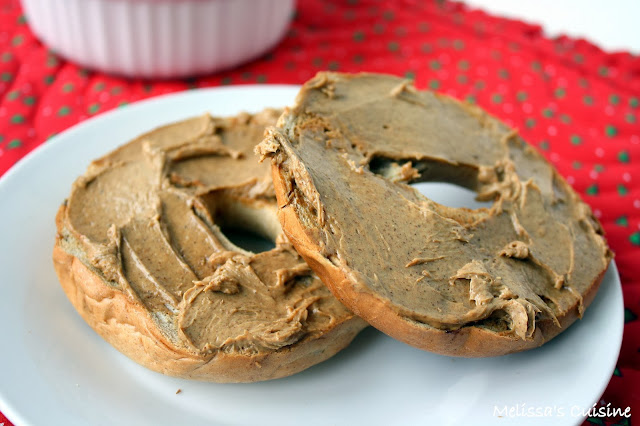
This spread was so easy to create as it is simply a spiced cream cheese. I also found its uses to be extremely versatile. I enjoyed this spread on a toasted bagel as well as as a dip for animal crackers. I think it would also pair wonderfully with sliced apples or graham crackers.
Gingerbread Spread
Makes approximately 1 cup
Ingredients:
1 8 ounce block cream cheese
2 Tablespoons molasses
1 teaspoon brown sugar
2 teaspoons Cinnamon
1 teaspoon ground Ginger
1/4 teaspoon Nutmeg
1/4 teaspoon ground Cloves
Mix all the ingredients together until smooth.
Store in a covered container in the fridge.
Source: Mele Cotte
I love holiday flavors. You know the ones I mean: pumpkin, apple, peppermint, gingerbread. Oh gingerbread, the quintessential flavor of Christmas!
Who hasn't decorated a gingerbread bread house or devoured a plate full of gingerbread boy cookies? This time of the year, gingerbread is so popular!

I wanted to stick with my flavors of the season theme for this month's Secret Recipe Club. The past two months I made something apple and pumpkin.
I was assigned Chris' blog, Mele Cotte. Did you know Mele Cotte means baked apple in Italian? I love baked apples, so I knew I would love Chris' blog. I had plenty of options to choose from as her recipe catalog is quite impressive! After narrowing down my list, I settled on making Gingerbread Spread.
This spread was so easy to create as it is simply a spiced cream cheese. I also found its uses to be extremely versatile. I enjoyed this spread on a toasted bagel as well as as a dip for animal crackers. I think it would also pair wonderfully with sliced apples or graham crackers.
Gingerbread Spread
Makes approximately 1 cup
Ingredients:
1 8 ounce block cream cheese
2 Tablespoons molasses
1 teaspoon brown sugar
2 teaspoons Cinnamon
1 teaspoon ground Ginger
1/4 teaspoon Nutmeg
1/4 teaspoon ground Cloves
Mix all the ingredients together until smooth.
Store in a covered container in the fridge.
Source: Mele Cotte
Friday, November 15, 2013
Chocolate Filled Crescent Rolls {Flashback Friday}
These flaky crescent rolls stuffed with chocolate taste like something from a fancy pastry shop!
When I was in Romania, we visited a little pastry shop in Sighisoara. I ordered a chocolate filled pastry and it was one of the best pastries I have ever had! The next year, we went back to Sighisoara but I couldn't remember where the pastry shop was. I was disappointed as I really wanted another of those delicious pastries!
I made these Chocolate Filled Crescent Rolls in an attempt to recreate the chocolate pastry from Romania. The taste was a little different because our chocolate is a lot sweeter than what they used in Romania. However, I loved how these pastries turned out. They are incredibly easy to make; they can be put together and out of the oven in less than 20 minutes! And, they taste like something you could order at a pastry shop!
Get the recipe: Chocolate Filled Crescent Rolls
Monday, November 11, 2013
Cookie Turkeys
These cookie turkeys are a fun and delicious holiday treat!
What are you thankful for? Today especially, I am thankful for our veterans and all those who have served our country. Be sure to thank a veteran today! I have so many more things to be thankful for: my husband and beautiful baby girl, our families, our home, good jobs, my friends. The list could go on and on. I hope that you'll take some time this month to really reflect on what you have and be thankful for it!
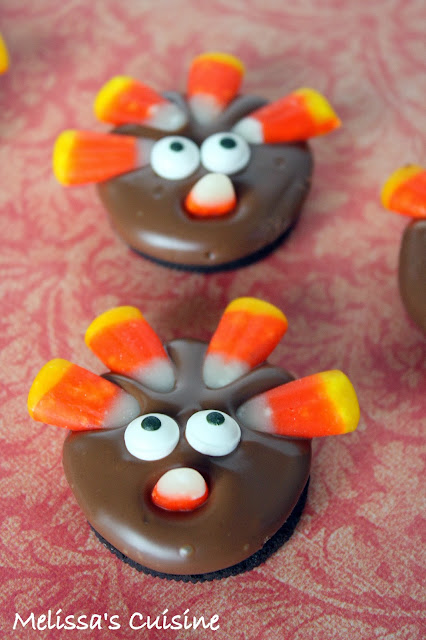
These cookies are a fun Thanksgiving treat! I made them by myself, but if you have kids, I think it would be a fun activity for them. The concept is simple: an Oreo cookie coated in chocolate and decorated with candies to look like a turkey!
I listed amounts for the ingredients, but you really don't have to abide by those. You can easily make more or less, just adjust the amount of chocolate based on the number of cookies you want to make. You can purchase the Candy Eyeballs online or at a local craft store.
My dad saw these cookies sitting on my counter the other day when he came over to babysit. He said something like 'Oh, those cookies look like turkeys!' Well...that was the goal, so it looks like I was successful!
Cookie Turkeys
Ingredients:
8 Oreo cookies
1/2 cup chocolate chips
40 candy corn pieces
16 Wilton Candy Eyeballs
1. Place cookies on a piece of waxed paper.
2. In a microwave safe bowl, melt the chocolate chips in 30 second increments until it can be stirred smooth.
3. Spoon approximately 1 Tablespoon of melted chocolate over each cookie. It should spread on its own over the cookie, but if it doesn't, you can spread the chocolate with a knife.
Alternatively, you could dip the entire cookie into the chocolate.
4. Press 4 candy corn pieces around the edge of the cookie, point side facing in, as the feathers.
5. Add the candy eyes and the beak (the tip of a candy corn).
6. Allow the chocolate to set before serving or storing.
Store in an airtight container.
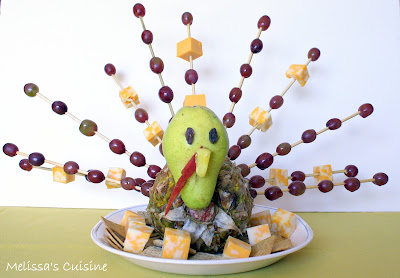
If you like this recipe, you might also enjoy this Fruit Turkey:
This post contains affiliate links.
Friday, November 08, 2013
Homemade Vanilla {Flashback Friday}
This homemade vanilla makes a great Christmas gift or the perfect pantry staple!
I love giving and receiving homemade gifts. There's something so special about the extra effort put into each gift. Last year, I gave my father-in-law a year's worth of baked goods; he could pick anything and I'd make him his own treat once a month. He loved the gift, and I've really enjoyed baking something for him each month.
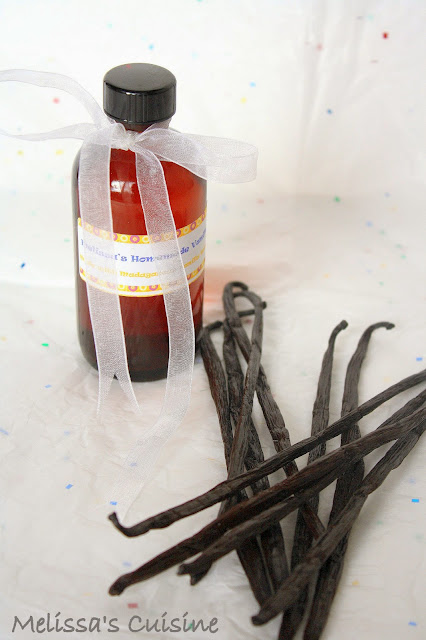
Another homemade gift I love to give is vanilla. Anyone who spends time in the kitchen can benefit from this gift. I use vanilla in cookies, cakes, muffins...almost everything I bake has vanilla in it. I always use my homemade vanilla. Last fall my boss traveled to Madagascar and brought back some Madagascan Vanilla Beans for me; the flavor it gives this vanilla is outrageous!
If you want to be really creative, you can design your own label for the vanilla like I did for the bottle in the top picture. It gives the gift an extra personal touch!
The vanilla takes about 8 weeks to reach full potency, so you'll want to make it soon if you want to gift it for Christmas! (I know it's only 7 weeks away, but that should be fine. You could always leave a vanilla bean or two in the jars you divide it into.)
Get the recipe: Homemade Vanilla
Wednesday, November 06, 2013
Cheesy Chicken Pot Pie
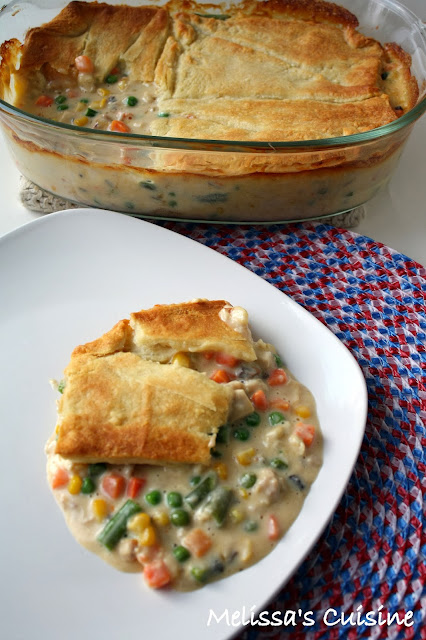
Cheesy chicken and vegetables topped with a flaky crescent roll crust!
I love getting recipes from other people. Then I know that the recipe is going to be good! If it wasn't, why bother telling someone else about it? My mom recently told me about a delicious and easy pot pie that she made for dinner. It sound good, and simple enough to put together--even on a day that I had to work!
It helps that the majority of this meal comes from pre-made foods, just mix it all together and throw it in the oven! I actually used a rotisserie chicken which made this meal even easier! I only needed 6 crescent rolls to top the casserole in the dish I made it in, but depending on the size of your casserole dish, you might need all 8. If you only use 6, just bake the other 2 according to package directions.
Cheesy Chicken Pot Pie
Serves 6
Ingredients:
2 chicken breasts, cooked and diced
1 pound bag mixed vegetables
1 can cream of chicken soup
1/2 pound Velveeta cheese
1 tube Pillsbury crescent rolls
1. Mix chicken breasts, vegetables, soup, and cheese in a microwave safe bowl.
2. Microwave for 2 minutes and stir to melt cheese.
3. Spread in a casserole dish.
4. Top with crescent rolls.
5. Bake at 350 for 30 minutes, until crescent rolls are golden brown.
6. Allow the dish to sit for about 10 minutes before serving to let the sauce thicken up.
If you are looking for more meal ideas, you'll want to be sure to check out this great Meal Planning Deal!
This post contains an affiliate link
.
I love getting recipes from other people. Then I know that the recipe is going to be good! If it wasn't, why bother telling someone else about it? My mom recently told me about a delicious and easy pot pie that she made for dinner. It sound good, and simple enough to put together--even on a day that I had to work!
It helps that the majority of this meal comes from pre-made foods, just mix it all together and throw it in the oven! I actually used a rotisserie chicken which made this meal even easier! I only needed 6 crescent rolls to top the casserole in the dish I made it in, but depending on the size of your casserole dish, you might need all 8. If you only use 6, just bake the other 2 according to package directions.
Cheesy Chicken Pot Pie
Serves 6
Ingredients:
2 chicken breasts, cooked and diced
1 pound bag mixed vegetables
1 can cream of chicken soup
1/2 pound Velveeta cheese
1 tube Pillsbury crescent rolls
1. Mix chicken breasts, vegetables, soup, and cheese in a microwave safe bowl.
2. Microwave for 2 minutes and stir to melt cheese.
3. Spread in a casserole dish.
4. Top with crescent rolls.
5. Bake at 350 for 30 minutes, until crescent rolls are golden brown.
6. Allow the dish to sit for about 10 minutes before serving to let the sauce thicken up.
If you are looking for more meal ideas, you'll want to be sure to check out this great Meal Planning Deal!
| |
Bonus Save: Bambooee $5 for a three-pack of eco-friendly, reusable bamboo towels |
| |
Bonus Save: iChameleons -Blackboard $12 for a six-foot, peel-and-stick chalkboard |
| |
Bonus Save: Dotzila - Pashmina $7 for a pashmina scarf — 12 color options available! |
| |
Bonus Save: Bluum $12 for a box of personalized goodies for mom and baby from Bluum |
This post contains an affiliate link
.
Monday, November 04, 2013
Pumpkin Rolls
These pumpkin shaped dinner rolls are sure to be a hit at your Thanksgiving dinner!
A friend of mine just posted on Facebook that she heard a Christmas song on the radio this morning! Have you heard Christmas music yet? I haven't decided yet if I'm ready for Christmas music. I love it, but Halloween was just a couple days ago and it's not even Thanksgiving yet. Typically I start listening to Christmas music the day after Thanksgiving.
Thanksgiving is such a special holiday and I think sometimes it get skipped over. I went to the store the day after Halloween and saw Halloween costumes and candy on clearance in one aisle, and Christmas decorations in the next aisle. Thanksgiving was nowhere to be found! I'm one of many people on Facebook participating in the 30 days of Thankfulness; each day we post something we are thankful for as our status. I think it's a good way to keep the focus on Thanksgiving!
So, I hope you don't mind, but rather than skip right to Christmas, I'll still be sharing some fall and Thanksgiving type recipes for the next couple weeks.
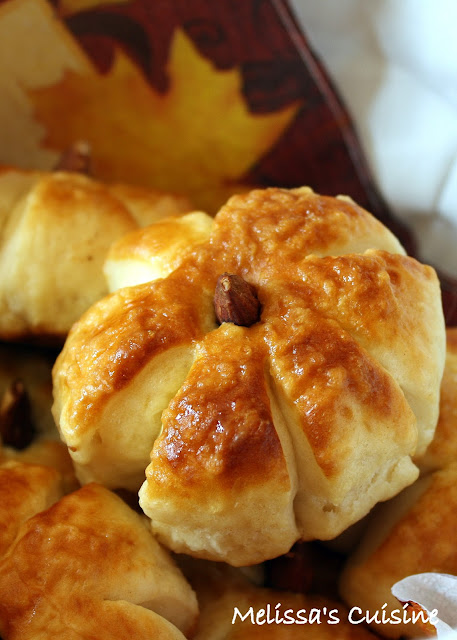
These dinner rolls were a hit at our Thanksgiving dinner last year. I made them using my favorite pretzel dough since our whole family was on a pretzel kick last fall. You can use any roll dough as long as it holds its shape. Using scissors, I cut little slits in a ball of dough and baked it. As soon as the rolls came out of the oven, I stuck an almond in the middle as the stem. Not only are these rolls delicious, they look gorgeous on your dinner table!
Pumpkin Rolls
Makes 12 rolls
Ingredients:
1 cup warm milk (about 110 degrees)
2-1/4 teaspoons yeast
3 tablespoons packed brown sugar
2-1/2 cups flour
2 Tablespoons butter
1 teaspoon salt
3 Tablespoons baking soda
coarse sea salt (or pretzel salt)
butter for brushing on top
12 almonds
1. Pour the warm milk into a large bowl and sprinkle with the yeast. Let it sit for about 2 minutes.
2. Mix in the brown sugar and 1 cup of flour.
3. Melt the 2 Tablespoons of butter and stir into the mixture.
4. Add the remaining flour and salt. Mix to form a slightly sticky dough.
5. Turn the dough onto a lightly floured surface and knead for about 5 minutes, until the dough is smooth but still slightly sticky.
6. Shape the dough into a ball, place in a lightly greased bowl, cover with plastic wrap and place it in a warm place to rise until the dough doubles (about 1 hour).
7. Punch the dough down and turn out onto a lightly floured surface.
8. Divide the dough into 12 pieces and roll them into a ball.
9. Using kitchen scissors, cut 6 1/2 inch slits around the dough ball, being sure to leave the center uncut.
10. Place on a parchment lined baking sheet.
11. Bake rolls at 450 for 8-10 minutes, until golden.
12. Remove rolls from the oven and brush with melted butter while hot. Sprinkle with coarse salt.
13. Press an almond vertically into the center of each roll as the stem.
Shaping idea from: Beyond Kimchee
Friday, November 01, 2013
Breadsticks {Flashback Friday}
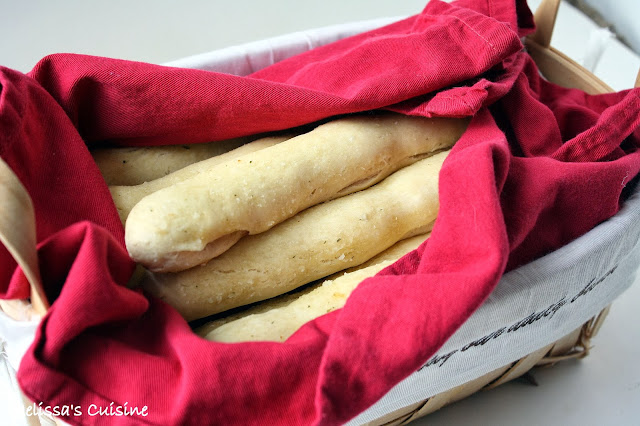
Buttery garlicky soft breadsticks--just like you'd get from a restaurant!
I have to admit, I think I was a little naive about how life would change after having a baby. I remember having conversations with Mike while I was pregnant about how we could still do everything we typically do and life wouldn't change that much. Wrong!
It's incredible how much life is affected by such a tiny little person! While we still are able to do many of the things we would do, like go to the apple orchard, everything just takes a little more planning than it used to. We have to plan our trips (even to the grocery store) around Summer's schedule. We're following the Baby Wise Method, so at least her schedule is very predictable. Then we have to make sure we have everything we might possibly need packed into the diaper bag. Let's face it, I haven't been on time to anything since Summer was born!
Mike and I are going on our first date night since having our baby next weekend! In the past 3 months, we haven't had much time to ourselves, so we are both looking forward to next Saturday.
That's where these breadsticks come in! Since we haven't been able (okay, we've chosen not to) go to our favorite restaurant, I re-created one of our favorite meals at home. Last week, I made chicken Alfredo and our favorite breadsticks at home. Okay, I might have cheated a bit by using a rotisserie chicken and jarred Alfredo sauce, but I made homemade breadsticks! These breadsticks are soft, buttery, and garlicky. Everything I look for in a breadstick! They're pretty simple to make, and you don't have to leave the comfort of your house to enjoy them!
Get the recipe: Olive Garden Breadsticks
This post contains an affiliate link.
Subscribe to:
Posts (Atom)


